Last week Microsoft released a preview version of Loop. It’s a dedicated tool for collaboration. You can use it for notes, task management, or meeting summaries. You can add colleagues and work together using workspaces or even embed them into Teams. Today I will show you how you can enable Loop Preview and how to work with it.
Enable Loop
Microsoft Loop is available as a Preview version. By default, it’s disabled for everyone in your tenant. You can check it by opening https://loop.microsoft.com. If you get this page it’s not yet enabled.

Let’s enable it.
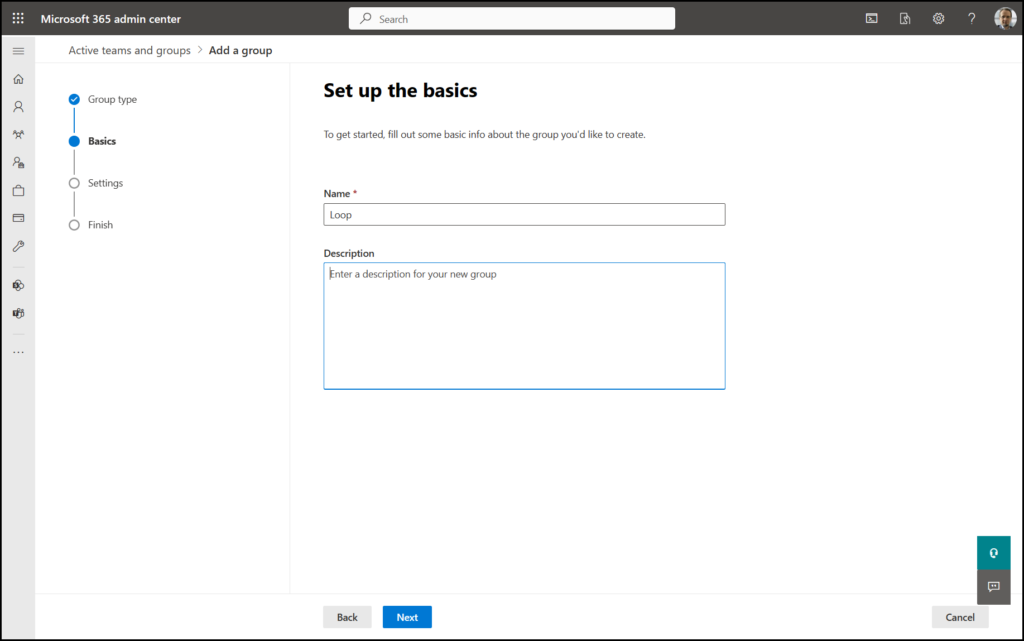
1. Navigate to Microsoft 365 Admin Center -> Active teams and groups and create a new Security group. Enter a name and create a new group.
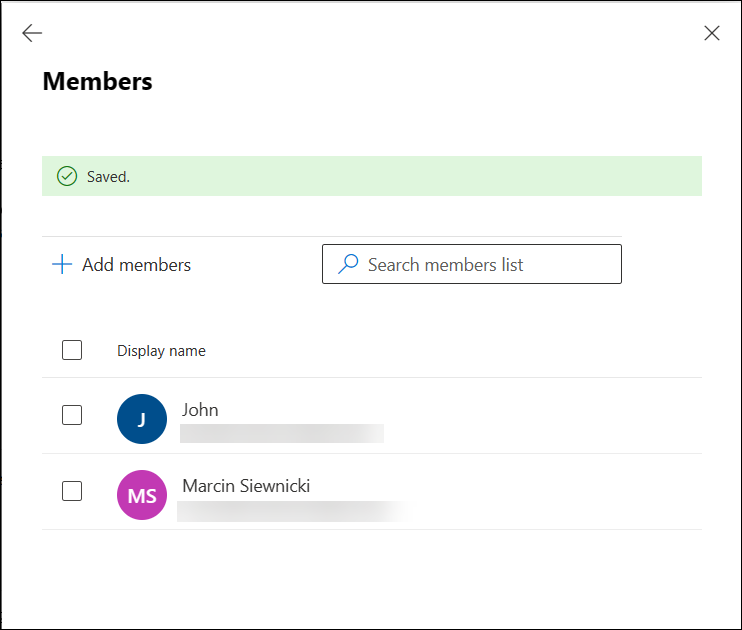
2. Add members to the group. Even if you’re the owner of that group you should add yourself as a member.
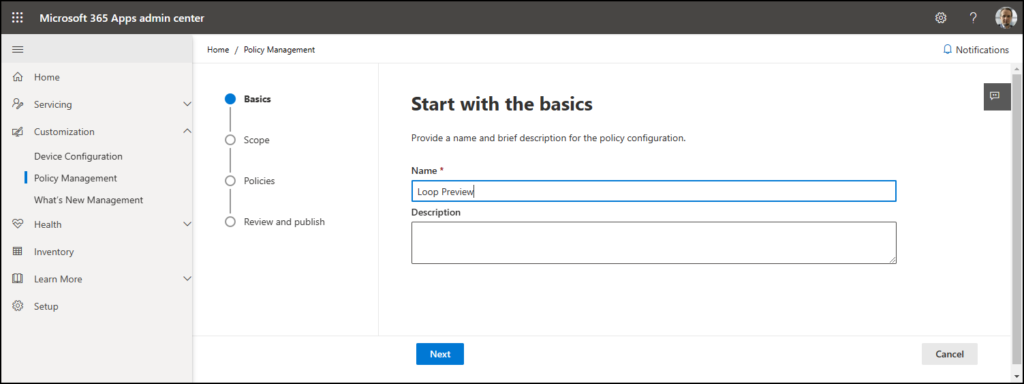
3. Navigate to https://config.office.com/officeSettings page, open the Customization section, and then the Policy configurations page. You must create a new policy to enable Loop for your users. Click Create button.

4. Enter a name and go to the next page
5. Add your Security group to the Scope

6. Search for “loop” in the Policies window
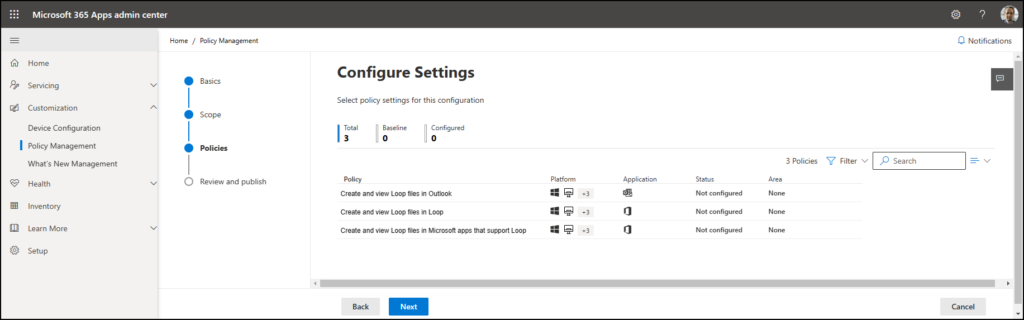
8. Enable each of the Policies by clicking on it and changing the status to Enabled

- When you’re done go to the next page and Create the policy. If it’s a new policy, you must wait a few hours. If you’re changing the policy an hour should be fine. Now you’re ready to open Loop!
Start with Loop
Open https://loop.microsoft.com, sign in if you didn’t before and you should get an opening page.

You get the Getting Started workspace as an introduction to Loop. Click on it and check what’s inside.

Quick overview:
- The page itself with content. You can think of it as a page in a notebook
- Left-hand navigation – list of all pages within your workspace
- A workspace – this is the main container for your pages. You can create many workspaces (for meetings, projects A, project B, and so on)
- Ideas page – a place where you can quickly save your ideas or temporary notes
- Recent section – latest changes in your pages
- Notification section and search
- Sharing option panel – especially important section. You can share pages and change sharing options
- Active members – other people actively working on the page
The Getting started workspace is an introduction and a guide to Loop. Go through the pages, check them, and play with the content.
Create a new page
Let’s go through all the main features by creating a new page.
1. Click the plus button and then the New page

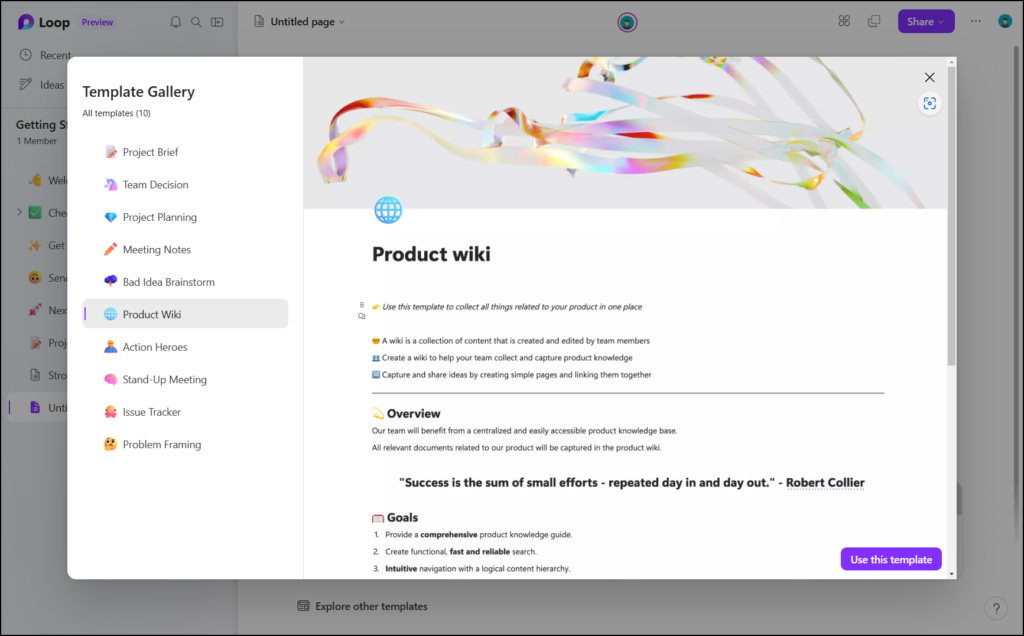
2. You can start from a blank page or use a template (Microsoft prepared 10 templates)
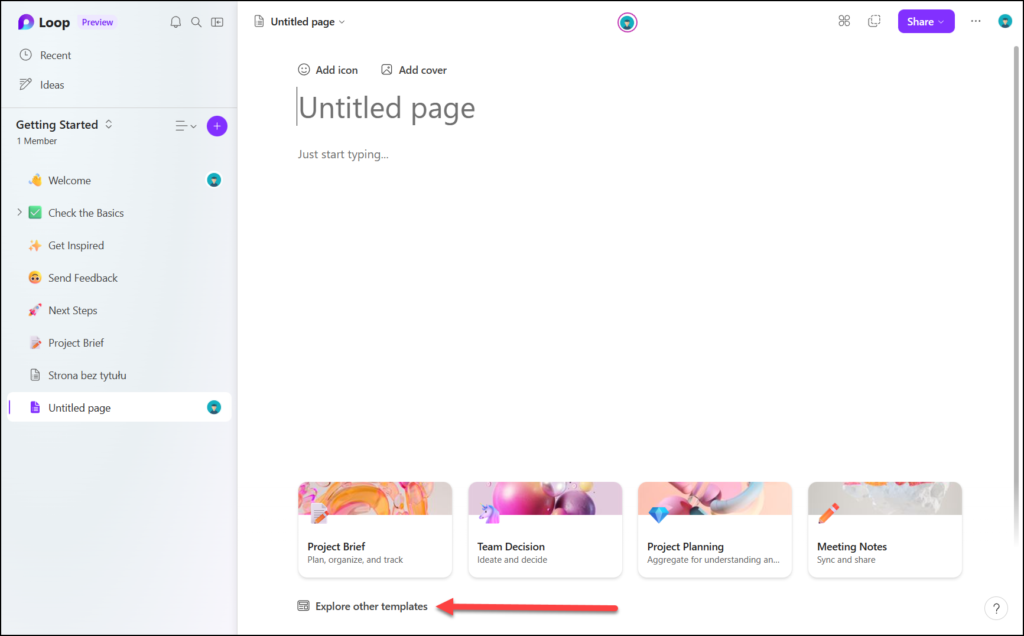
3. Select a template and click Use this template
4. Every page has its own cover image. You can change it by clicking on the cover image
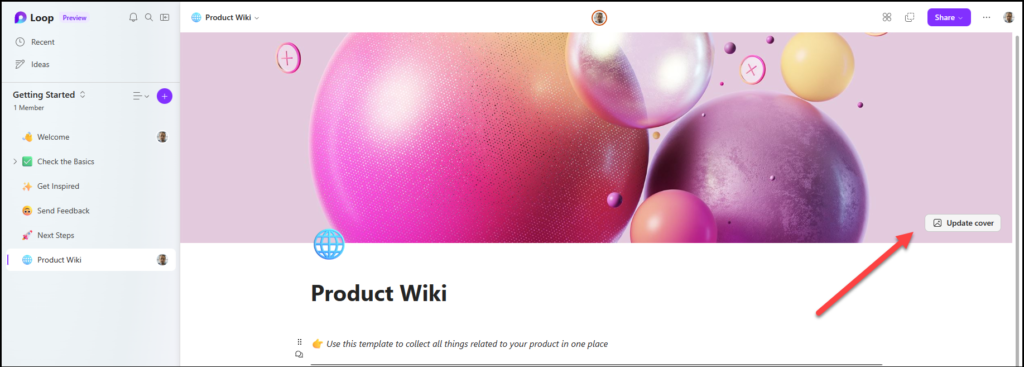
5. You can select from predefined images or remove them from the page. Images prepared by Microsoft are beautiful!

6. You can organize your notes or information using a similar concept to WordPress or Notions. Enter slash (/) character and you will get a list of possible components. The list isn’t as big as in Notion, but it provides you basic components (headings, tables, lists, emojis, dates, labels, images).

7. When you click inside a component (e.g. table) you can embed additional components. This time components are limited to specific components – you can’t embed a table inside a table 😊

Sharing
Using those components you can arrange information in the way you want. Add additional components or pages and build a project center or a knowledge database. The biggest power comes with sharing options and working together with your colleagues.
1. You can share a page in the same way as a document on a SharePoint site or in Teams. Click on a Share button and select Page link or a Workspace.
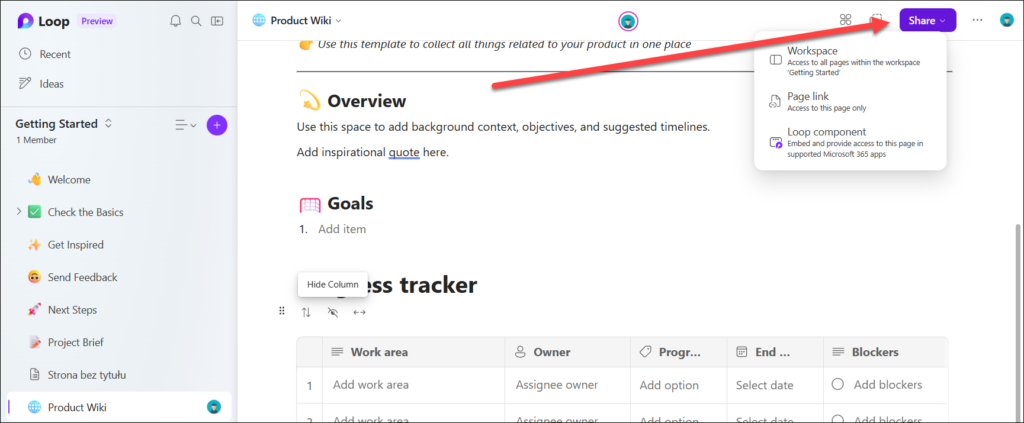
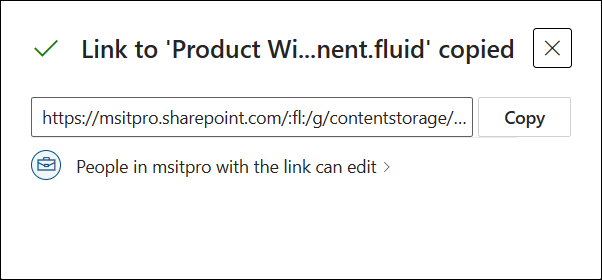
2. As a result, you will get a link with edit rights (same as in SharePoint/Teams). You can modify edit permissions and specify the target audience (people within your organization with a link, existing people in the workspace, selected people). You can share it with people from outside of your organization.
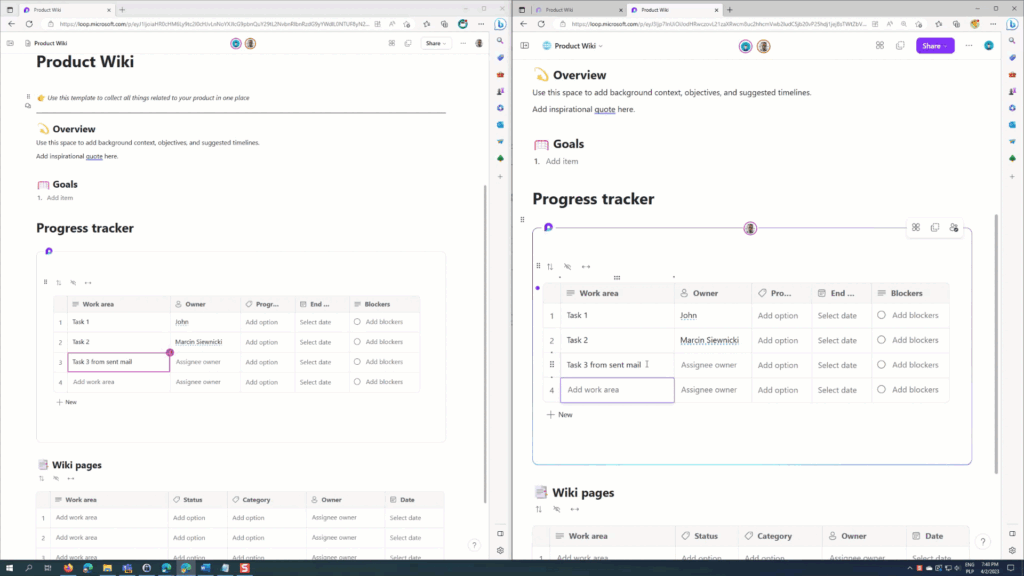
3. If your colleague opens the shared page, you can both work on it almost in real-time!
Sharing components
Sharing an entire page or a workspace is great but what to do if you need to share only a part of the page (e.g., a table with tasks)? You can do this by converting a component into a Loop component and sharing this component.
1. Navigate to the component you want to share, click on the left dots menu, and then on the Create Loop component
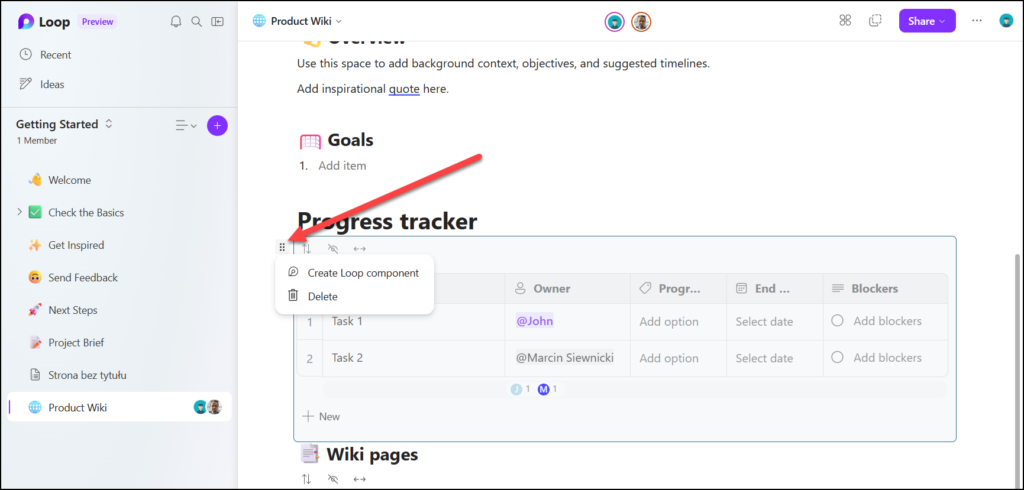
2. The component gets a Loop logo in the top left corner and a border. Now click on the top right option to share it.

3. Modify sharing options if you want and send the link

Integration with Word, Excel, and Teams
So far so good – you can organize information and share it with your colleagues. Now let’s go and use it inside other Microsoft 365 services! You can embed Loop in e-mails, word documents, and Teams personal/group chats.
1. Get sharing a link to a component or a page
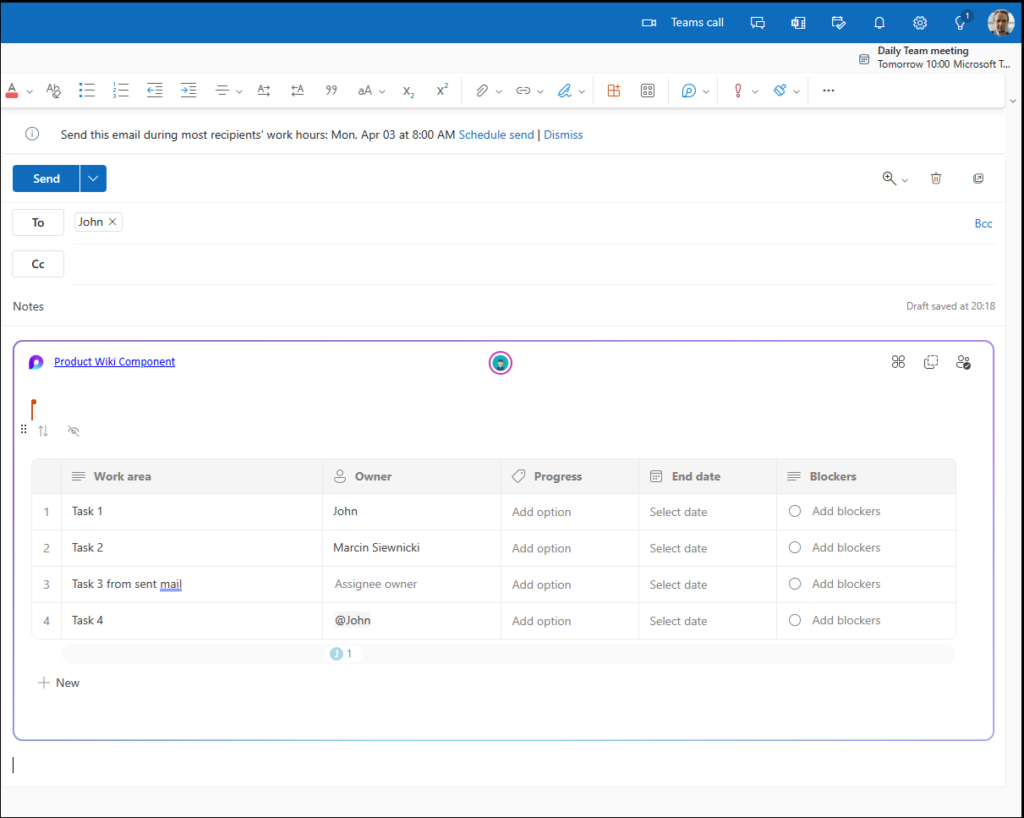
2. Paste it in a chat window and send it. The recipient will get a fully working component and can use it directly from a chat window (edit information, add other components, etc.)

You can paste it into a Word document,

or into an e-mail message
3. You can always check where your shared component is used. Click on the Shared locations button and you will get a list of existing documents/places with your component.

Summary
Loop components were introduced about 2 years ago. They were available in Teams and in SharePoint with limited features. The latest release makes it available as a separate product connected to other Microsoft 365 services (Word, Outlook, Teams). Microsoft added more component types, added workspaces, and fully working pages, and enabled sharing options.
It’s similar to Notion and the whole idea is very close to Notion – modern notes with sharing options. Microsoft Loop obtained its own path using deep integration with Microsoft 365. The Preview version is still limited (only basic components, limited template options, no 3rd party components) but integration options show what we should expect in the future. Image one source of truth (Loop workspace) with embedded components in many documents, emails, or chats. People can work together but in the end, you maintain only one service. If I update project tasks in a chat, it will be populated to the project documentation (Word) and to the Loop itself. No more matching Word docs with notes when something changes. I can imagine a Flow that generates a PDF from a such document and send it to a Customer!