Microsoft added a new AI-powered capability to SharePoint that lets you turn any Word document into an intelligent form. When someone fills it out, a properly formatted document is generated automatically without manual edits or copy-pasting. Let’s see how it works.
Introduction
Structured document generation is a new feature that lets you turn Word document templates into SharePoint forms. When your users submit a form, a new document is automatically created based on the template with all submitted values merged into the appropriate fields in the document. Using this mechanism, your users generate consistent and standardized documents that are automatically saved in SharePoint.
This feature is useful for business processes that generate standardized documents, such as:
- Contracts
- NDAs
- Statements of work
- Purchase orders
- Payment authorizations
- Employment verification letters
- Offer letters
- Proposals
- Bid documents
- Statements of compliance.
Prerequisites
What you need before you start:
- Microsoft 365 Copilot license (for template creators only; submitters don’t need one)
- Edit permissions on the SharePoint document library
- A Word document (.docx) to use as the template
This feature is part of AI in SharePoint capabilities. It’s available in Public Preview and requires opt-in. Sites that are not opted in do not receive preview benefits. Check the full requirements and additional information on the Microsoft site.
Create a Form from a Word Template
To start, you need a SharePoint document library and a Word file.
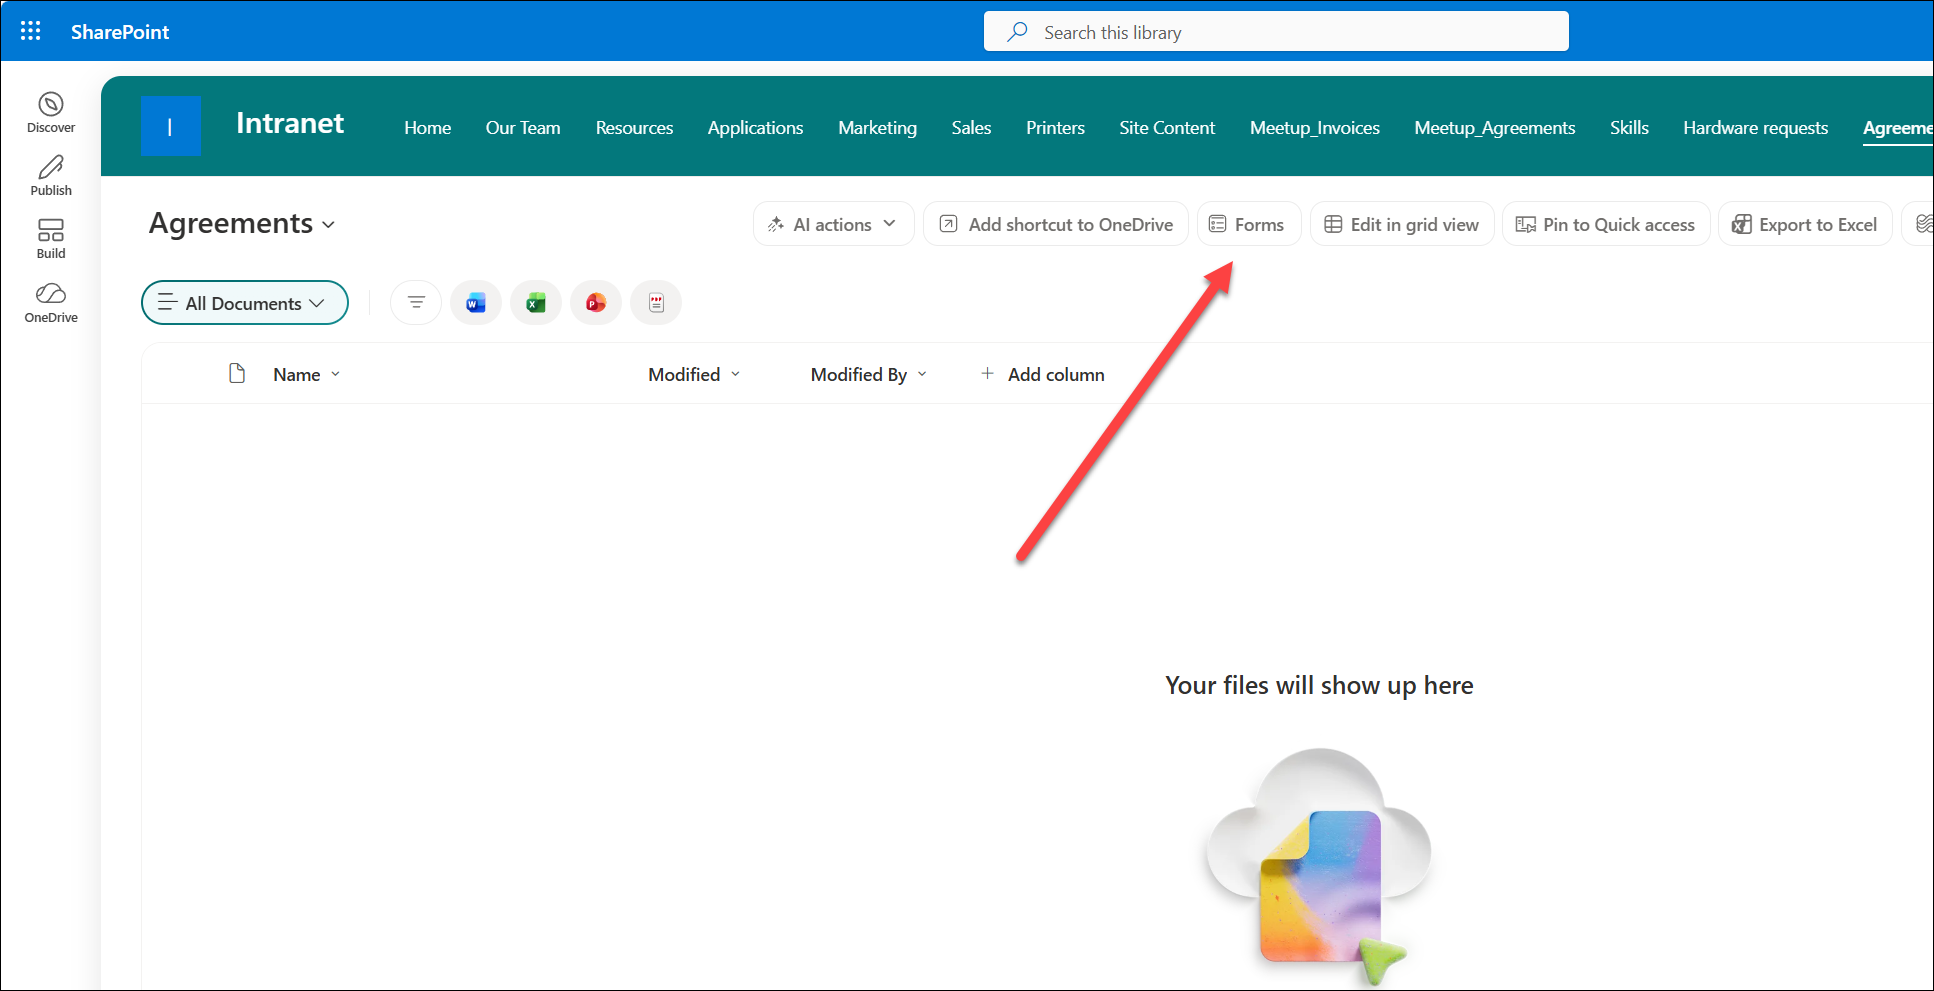
1. Open the document library and select the Forms button from the command bar.
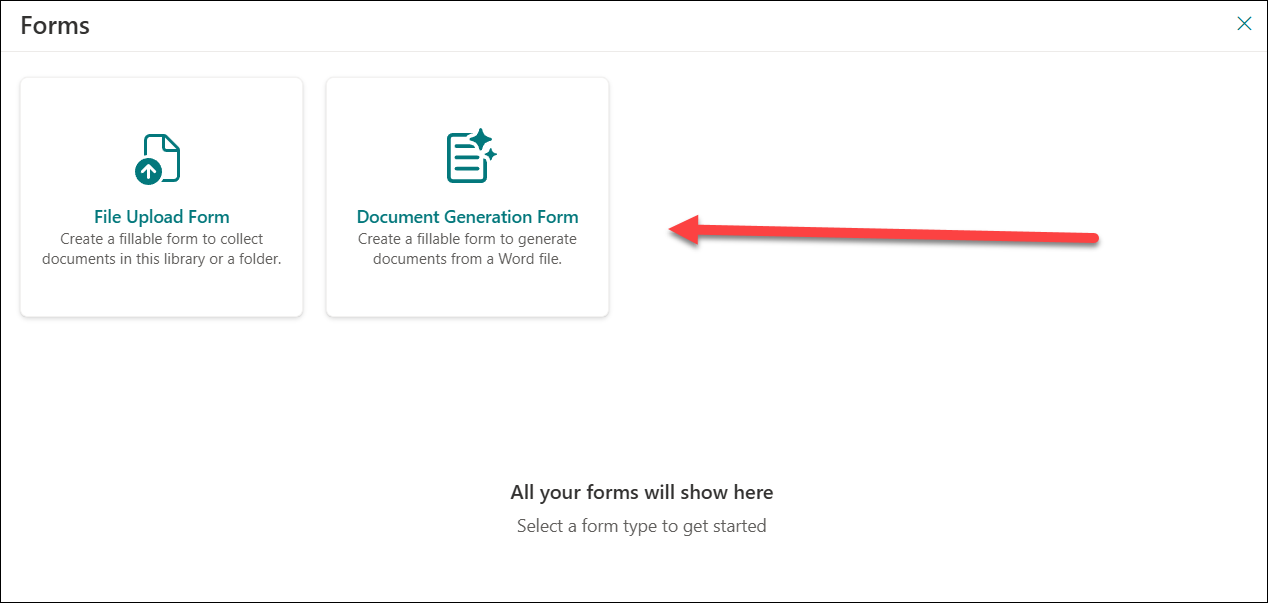
2. Choose Create a document generation form.
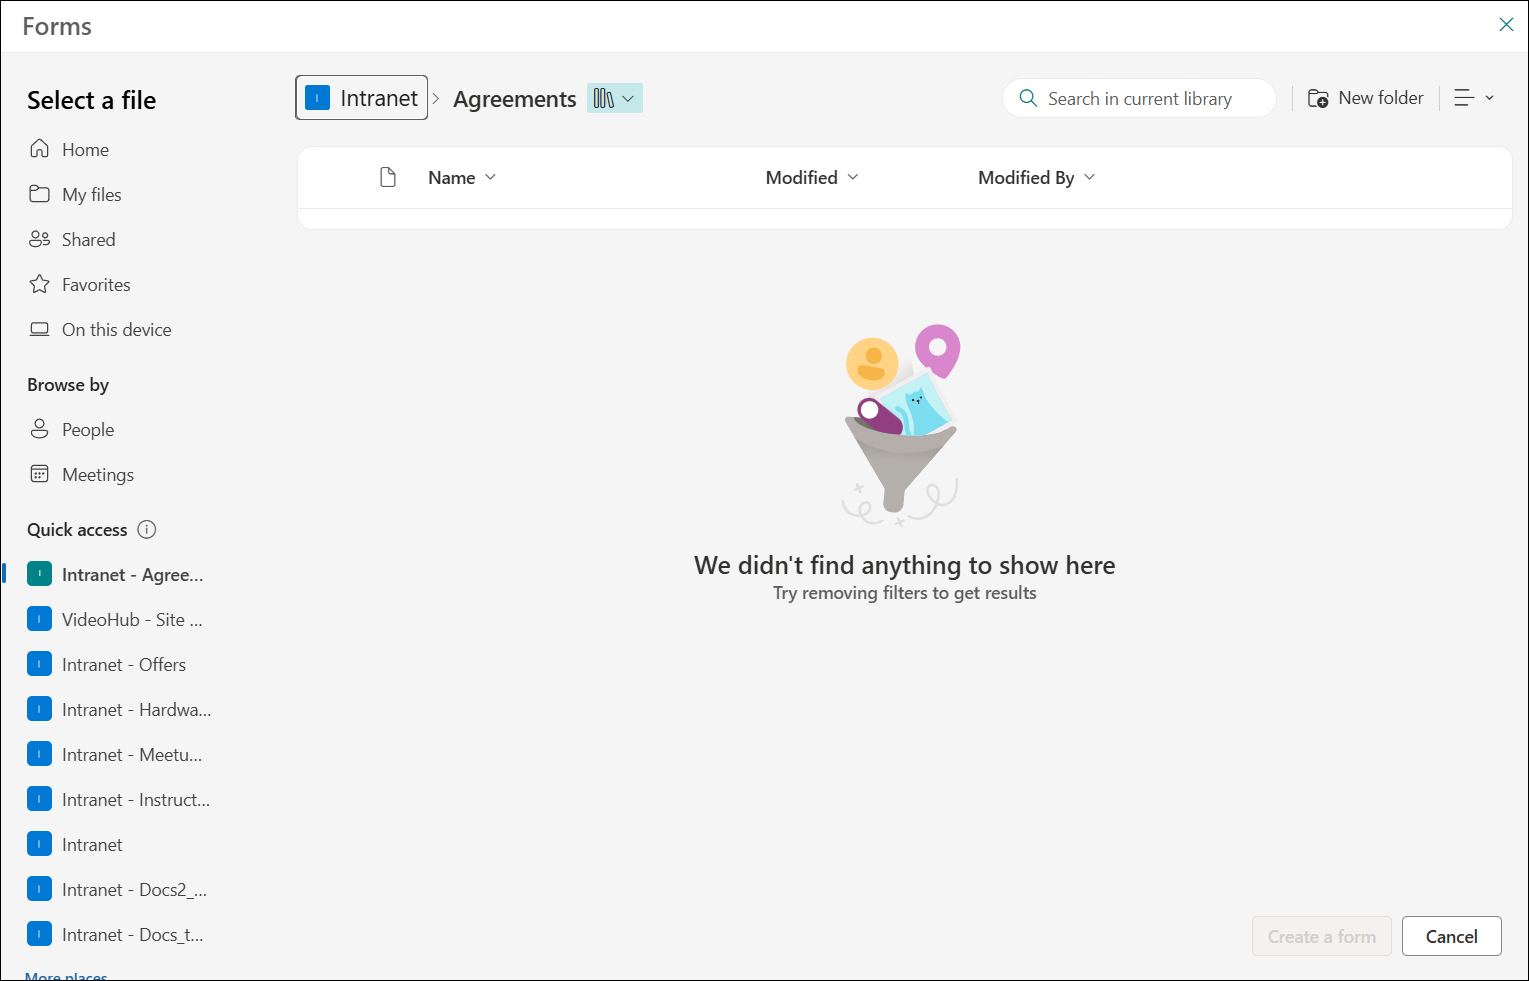
3. Upload the Word file (from SharePoint, OneDrive, or local device).
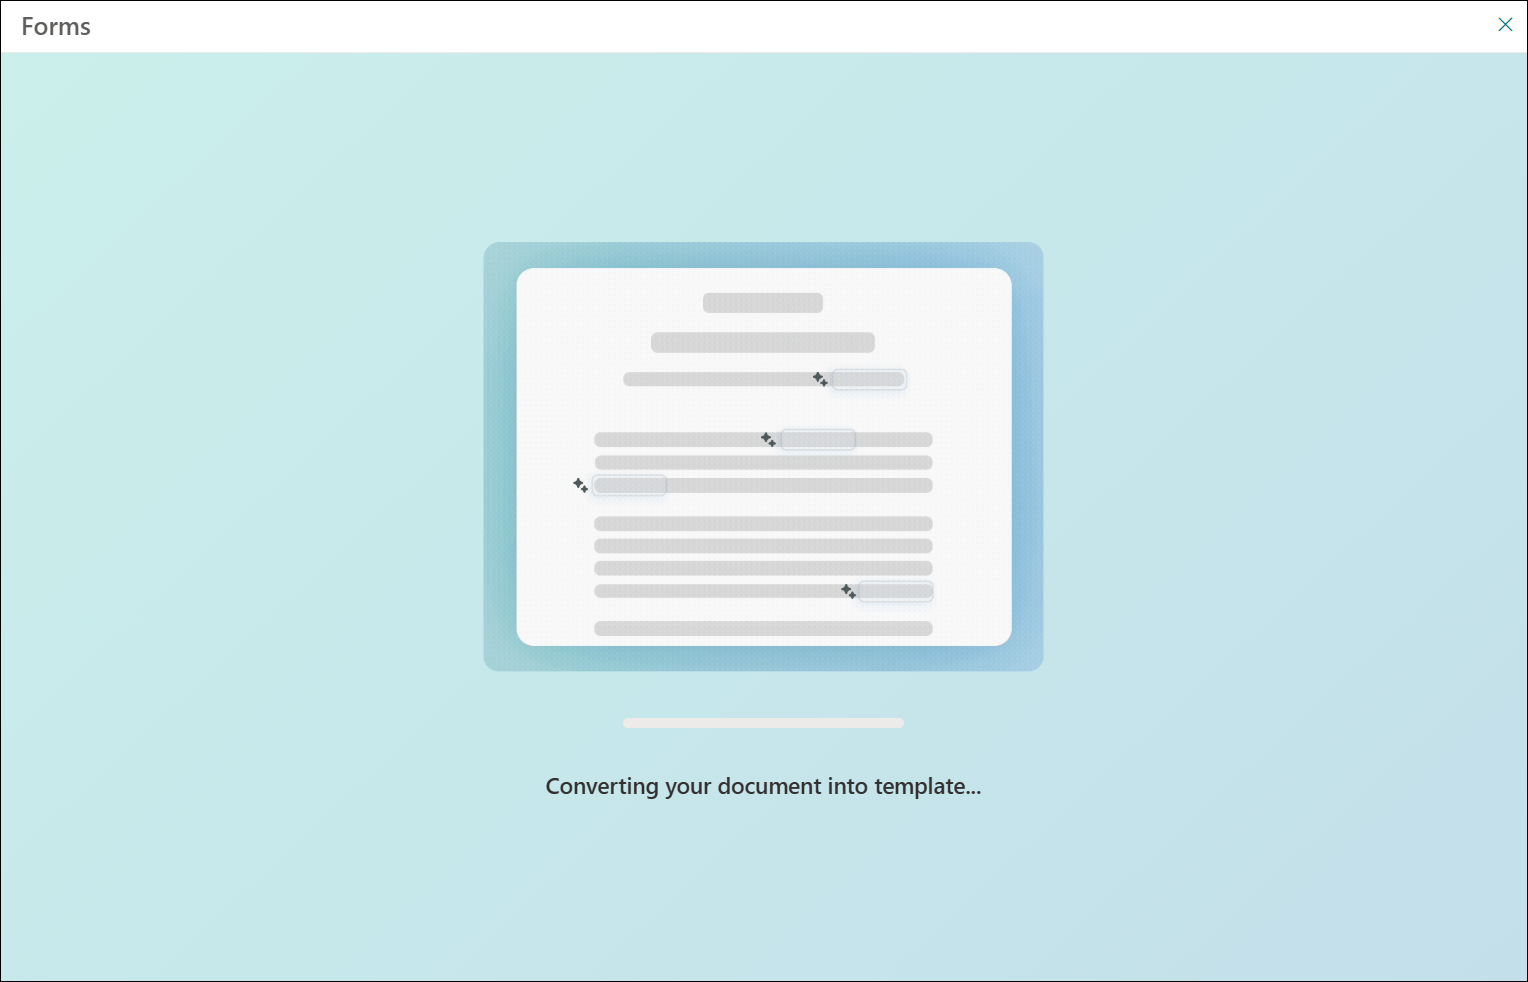
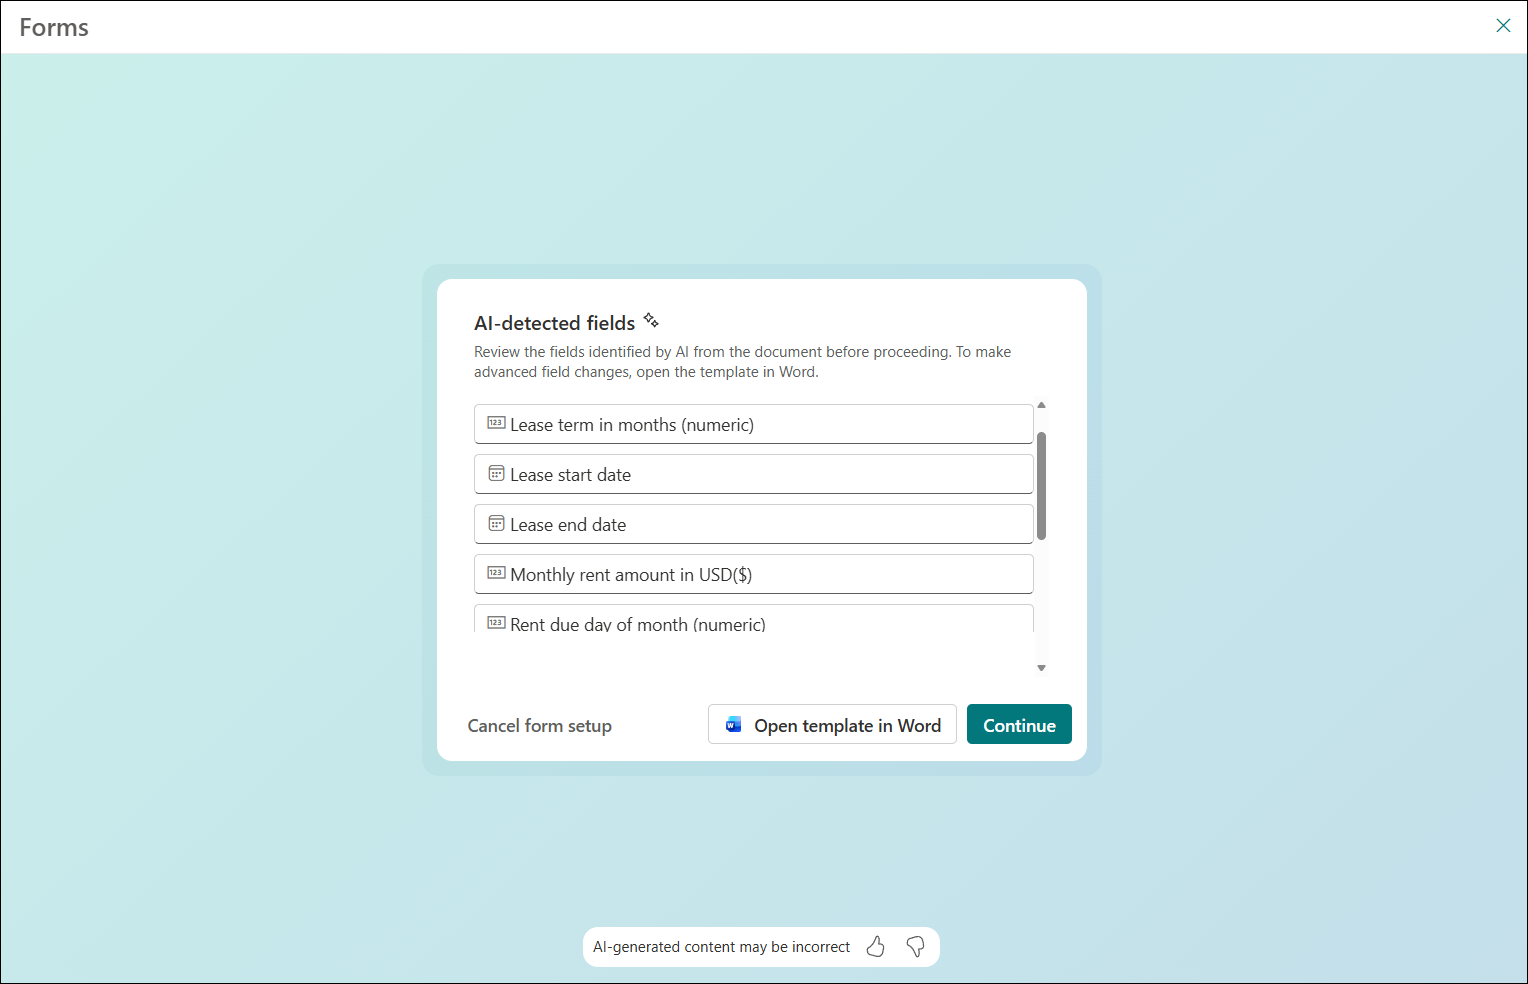
4. SharePoint AI analyzes the document and automatically suggests fields (names, dates, addresses, etc.).
5. Review the detected fields and modify if needed, confirm which are required, rename them to match your terminology, and see where each maps in the document. The mechanism is pretty good in mapping fields, but you need to check it to be sure that everything is correct.
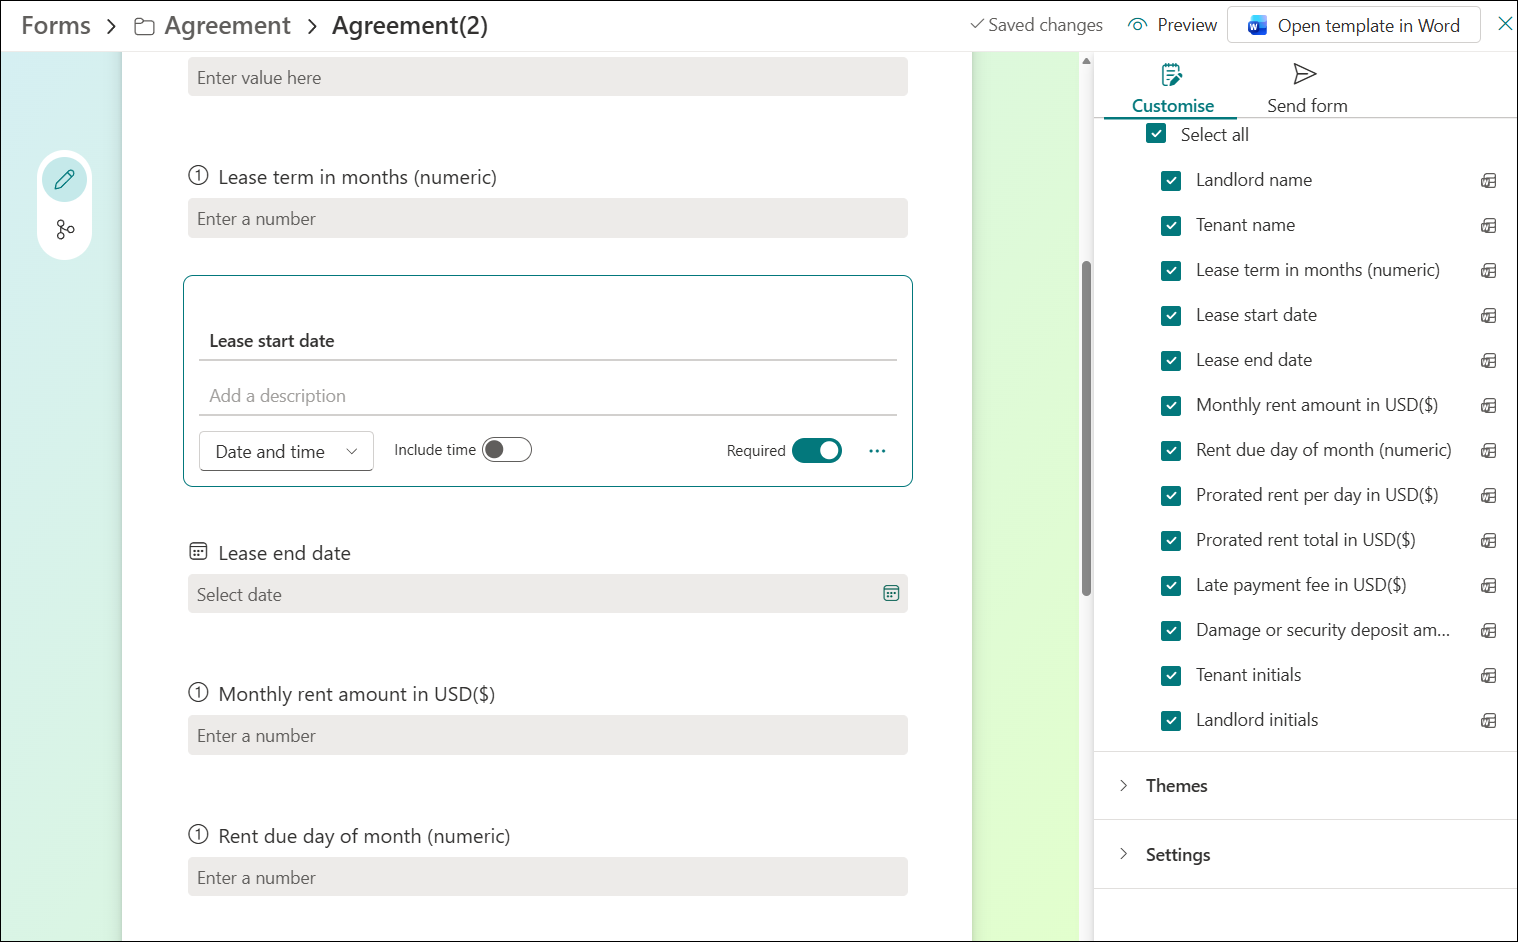
Configure Fields and Field Types
At this stage, you can configure each field (requirement, name, type) or add a new one if needed.
The form supports the following field types:
- Single line of text
- Multiple lines of text
- Number
- Date and time
- Hyperlink
- Choice (dropdown)
- Image (for logos, signatures)
- SharePoint List (lookup from a list column)
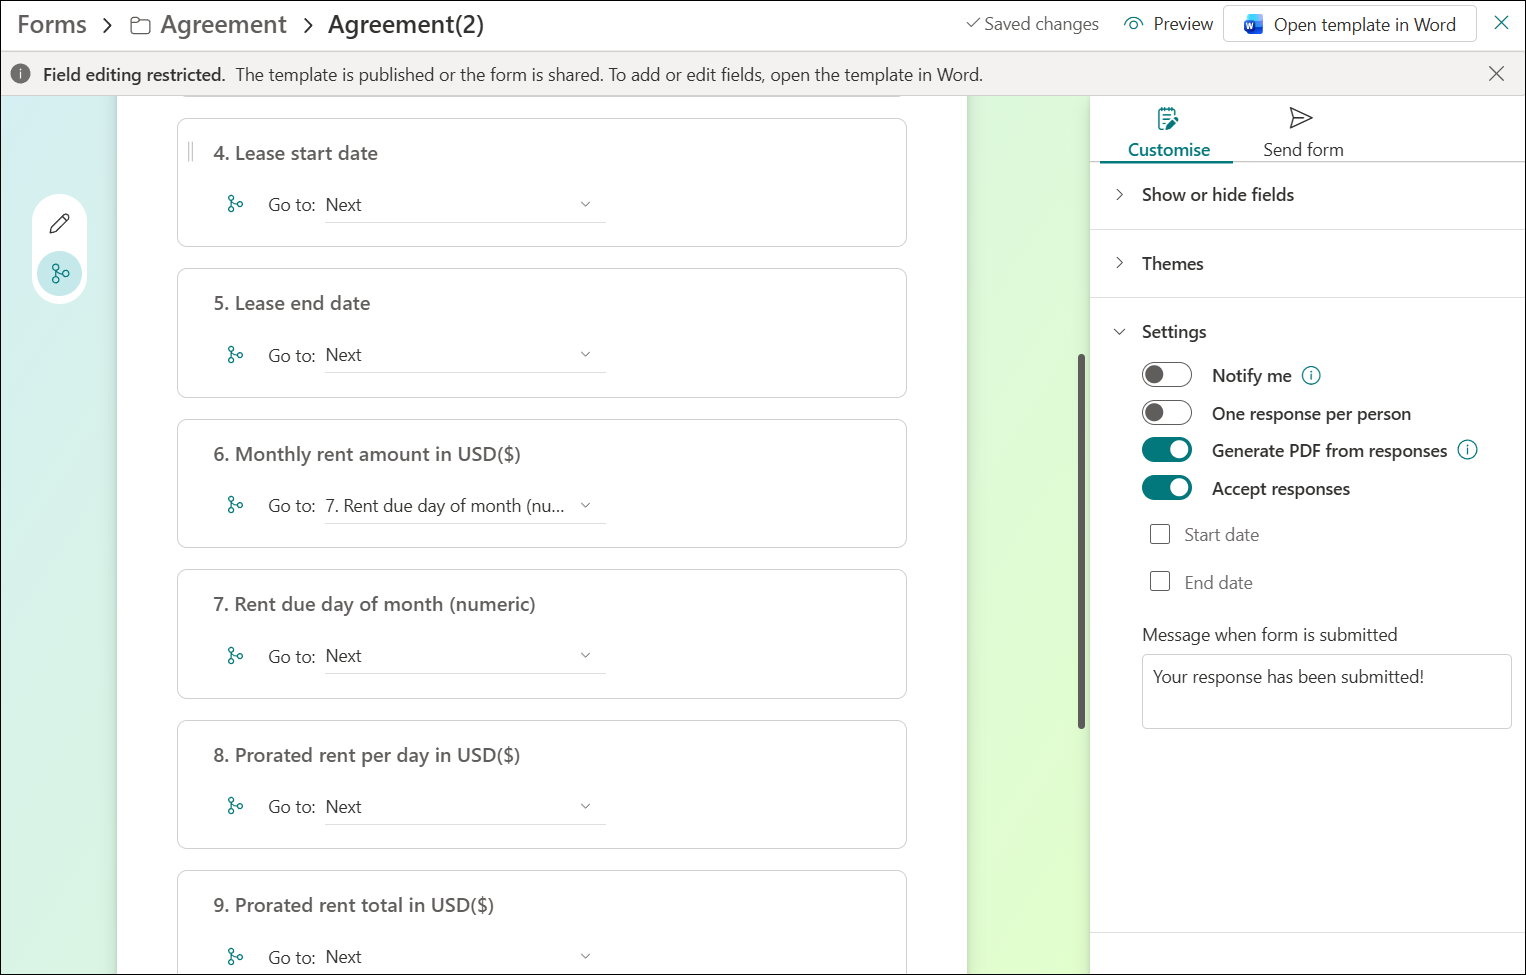
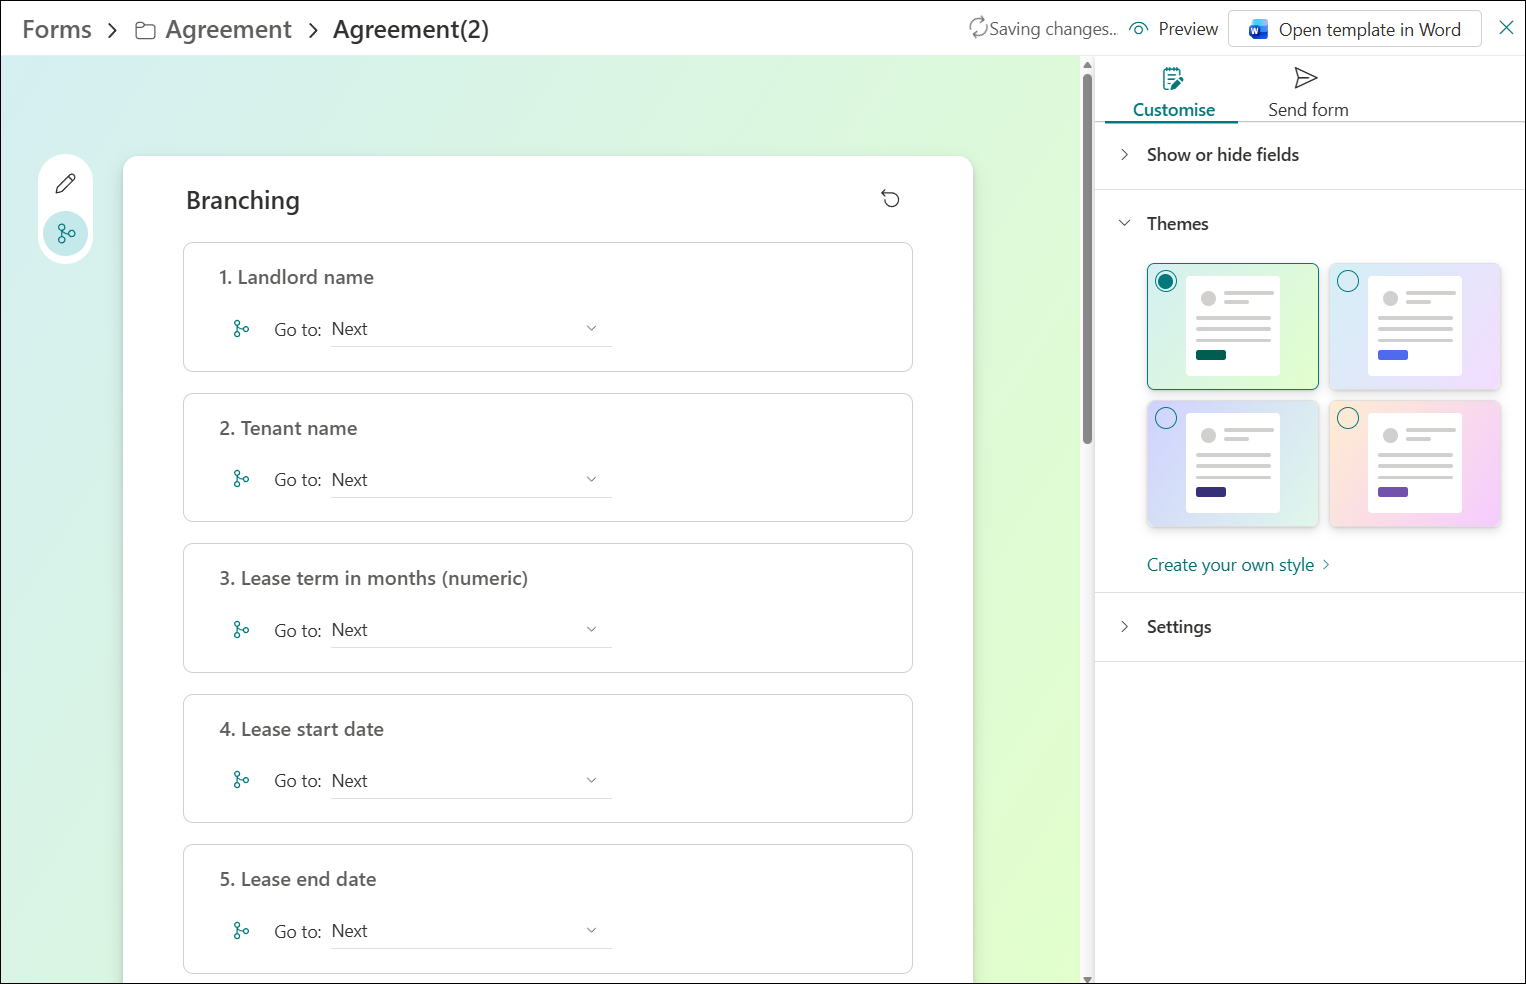
Set Up Branching
You can configure branching options for each field. To do that, select the Branching icon in the left-hand pane.
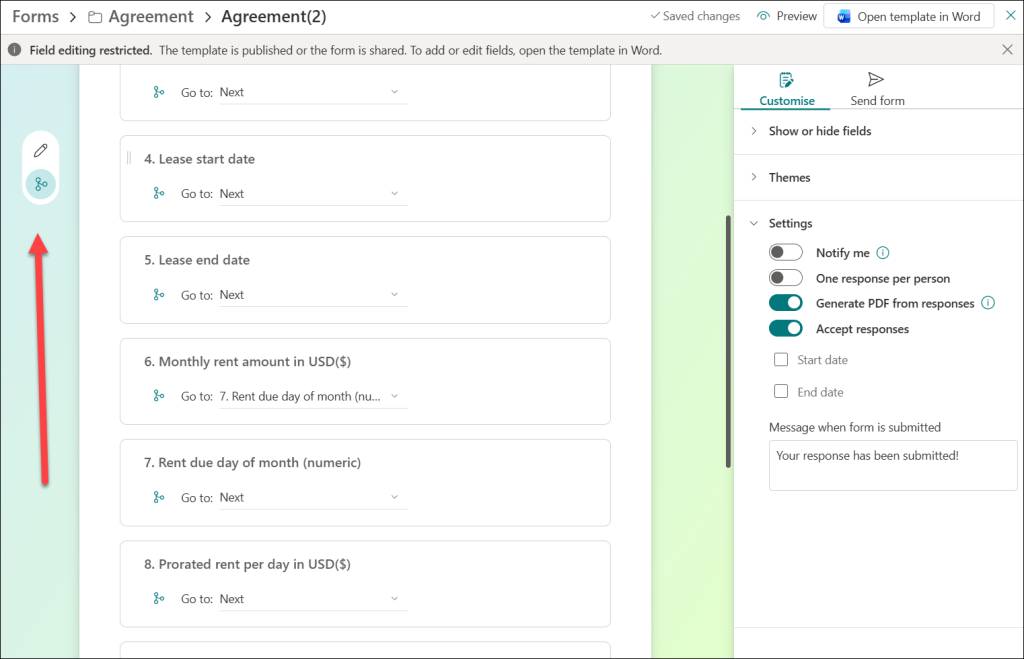
Each field in the form has a Go to option that controls what happens after the submitter fills it in. By default, every field is set to Go to: Next, which means the form moves sequentially from one field to the next. But you can change that.
Branching lets you build smart forms that skip irrelevant fields or jump right to the end of the form. This is useful when your form covers multiple scenarios, and not every question applies to every person.
Set Up Conditional Sections
You can also configure conditional sections to control which parts of the document appear based on the submitter’s input. For example, country-specific legal clauses that only appear when a particular country is selected. Conditional sections are available only when you open the Word document connected to the SharePoint form.
1. Open the template in Word, go to Conditional sections in the Manage templates pane.
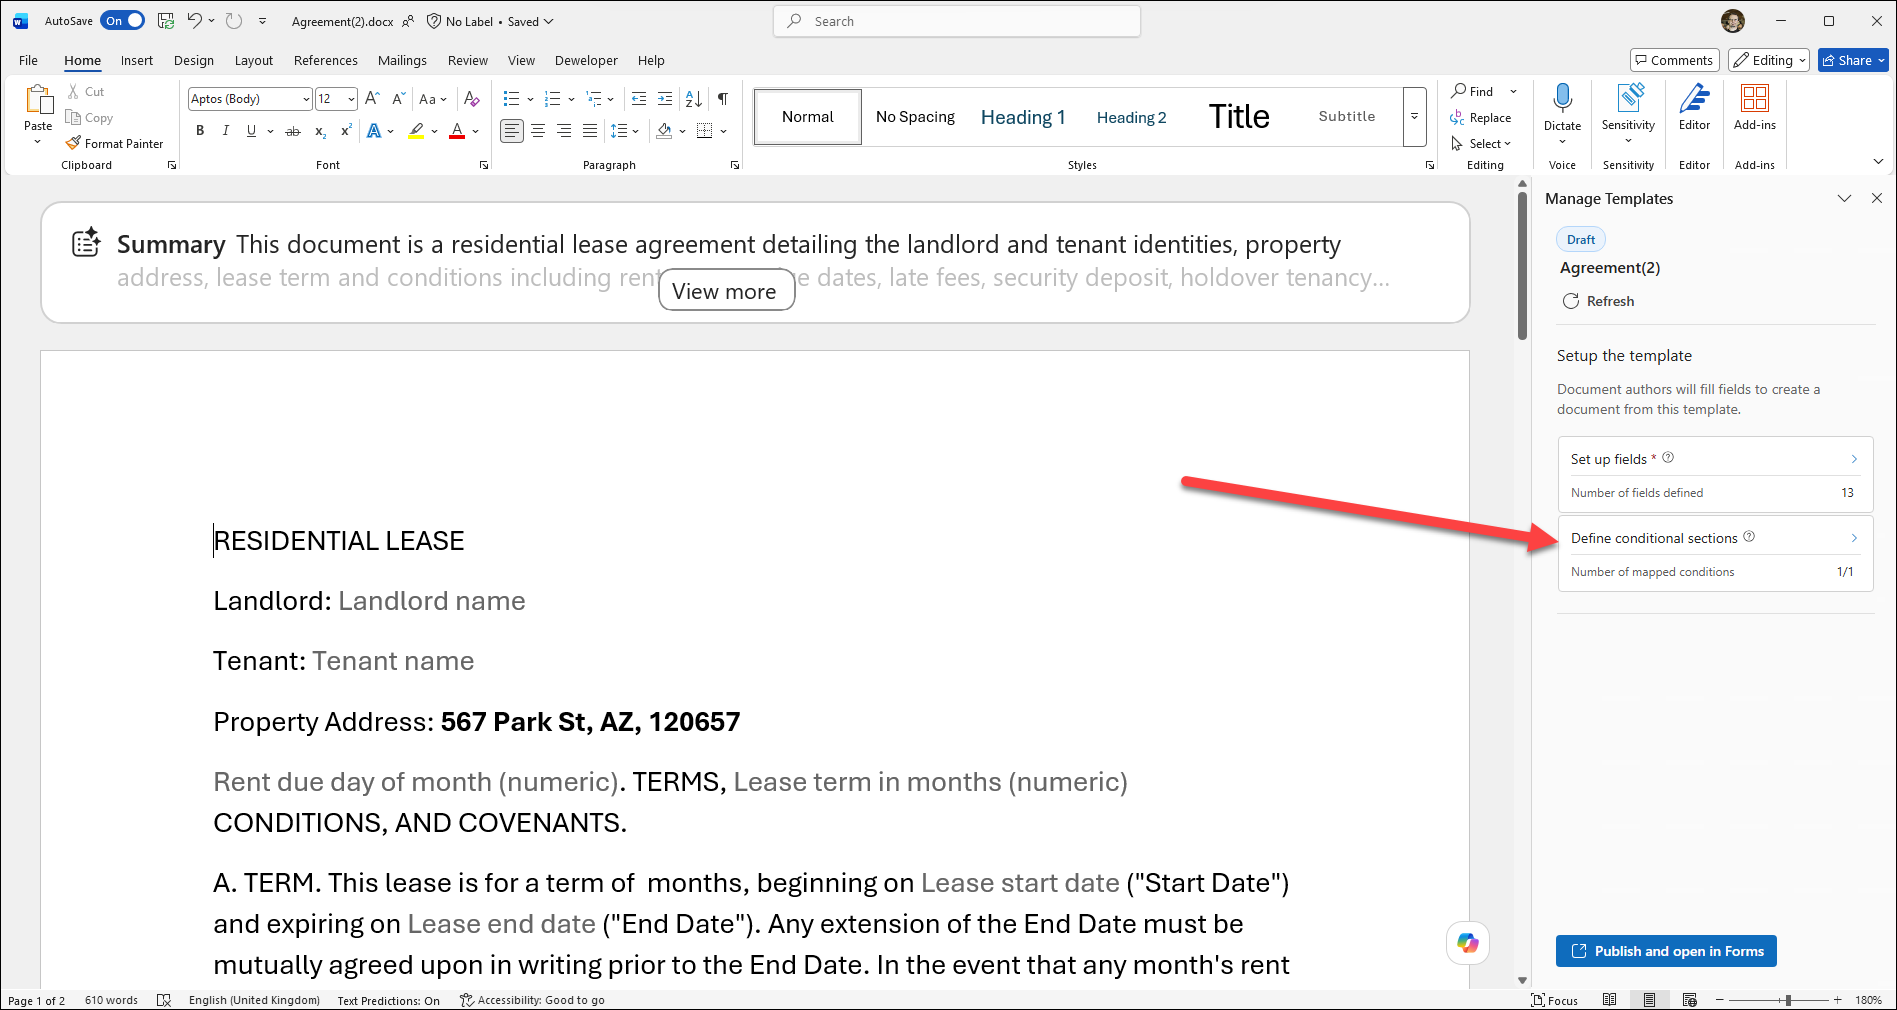
2. Create a new section with a name. In this example, I created a section that is enabled when a Lease start date is greater than Jun 1, 2026.
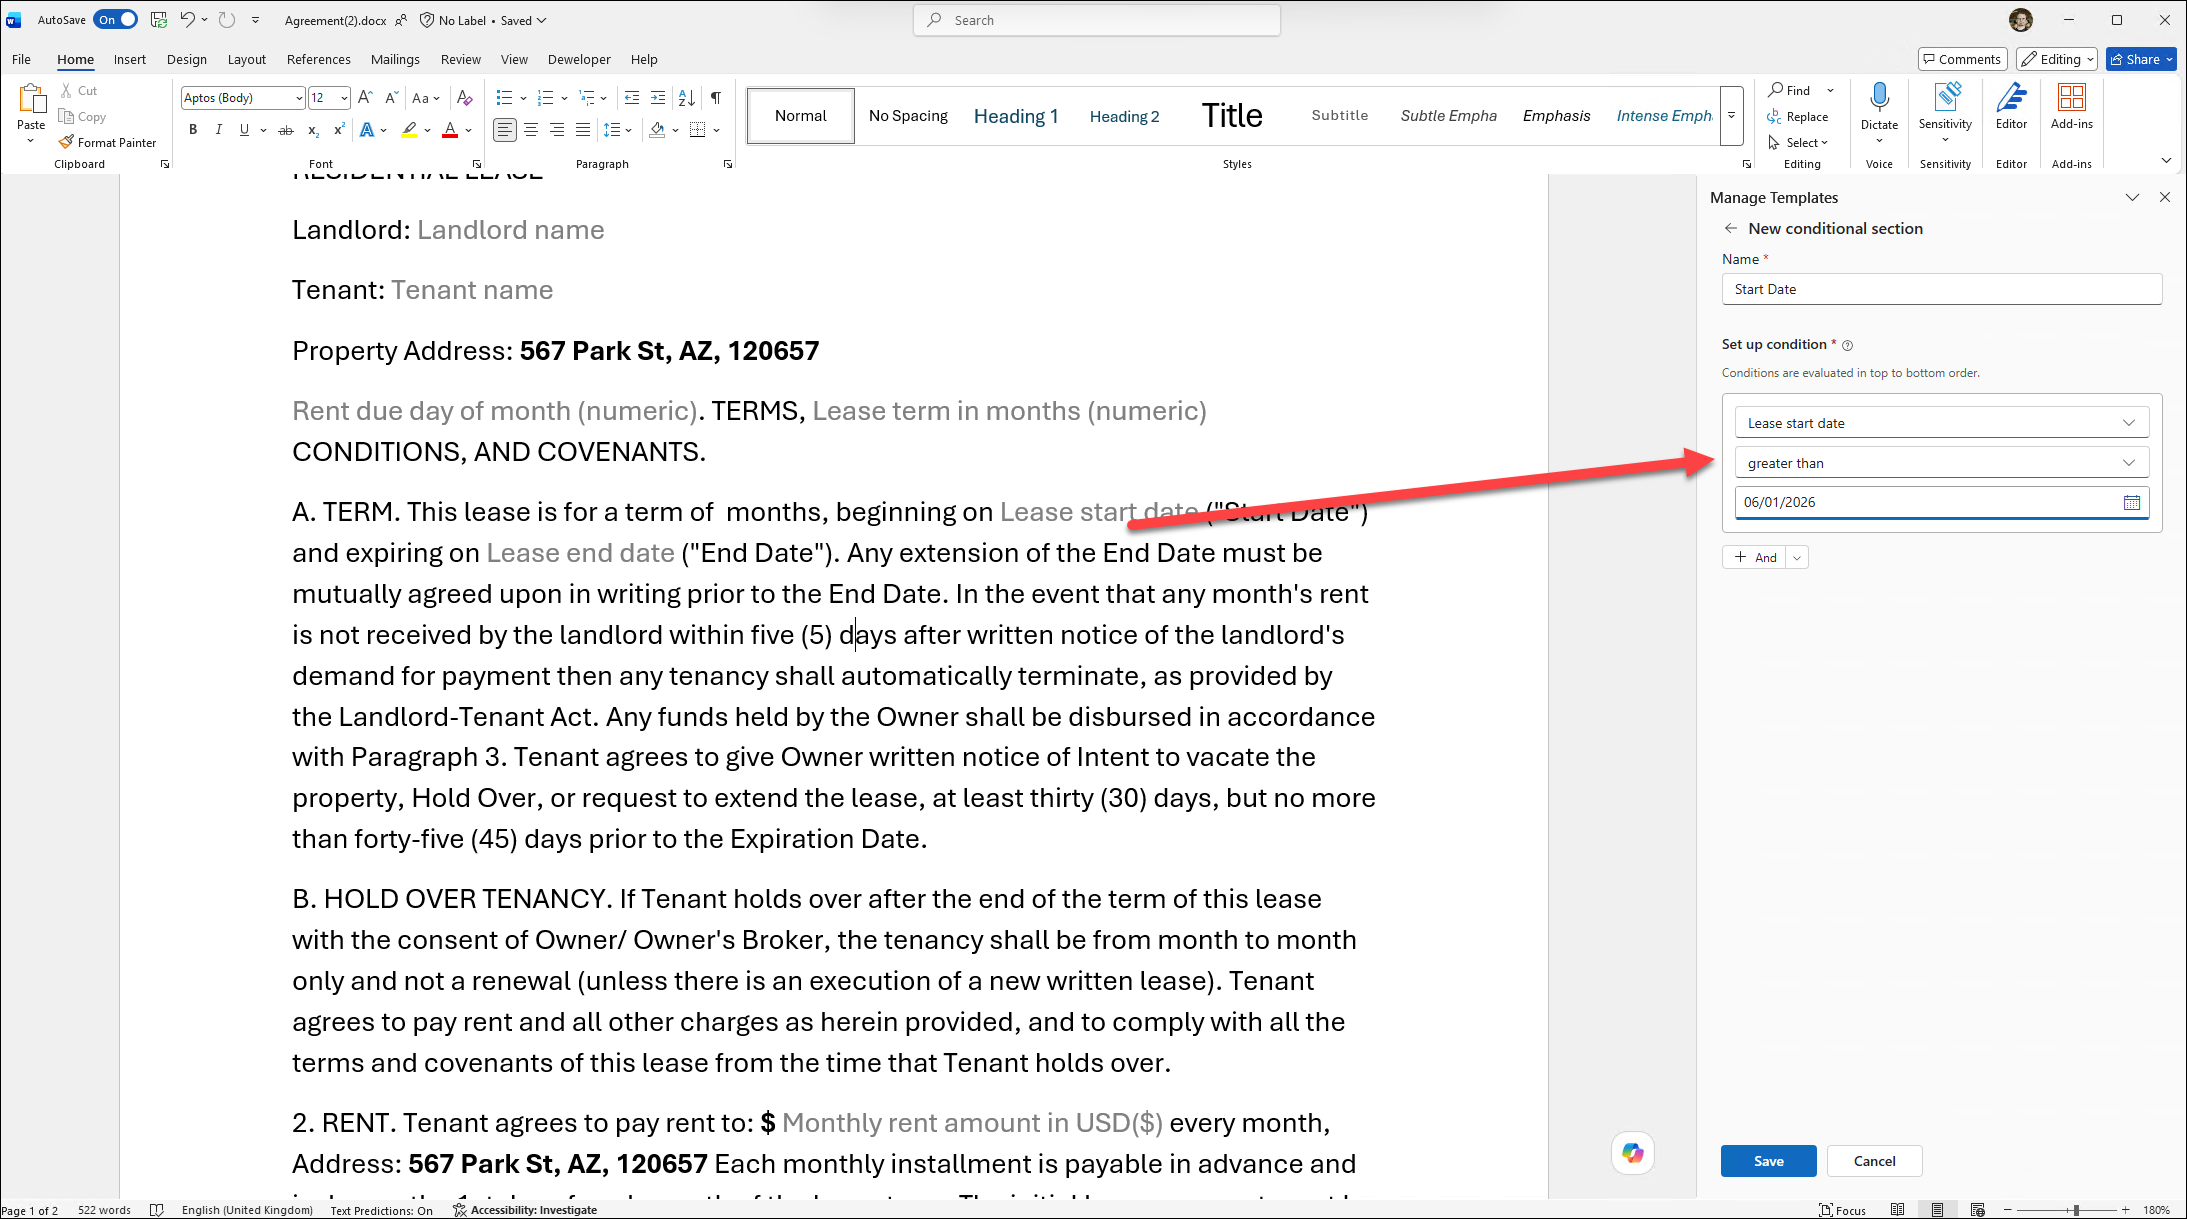
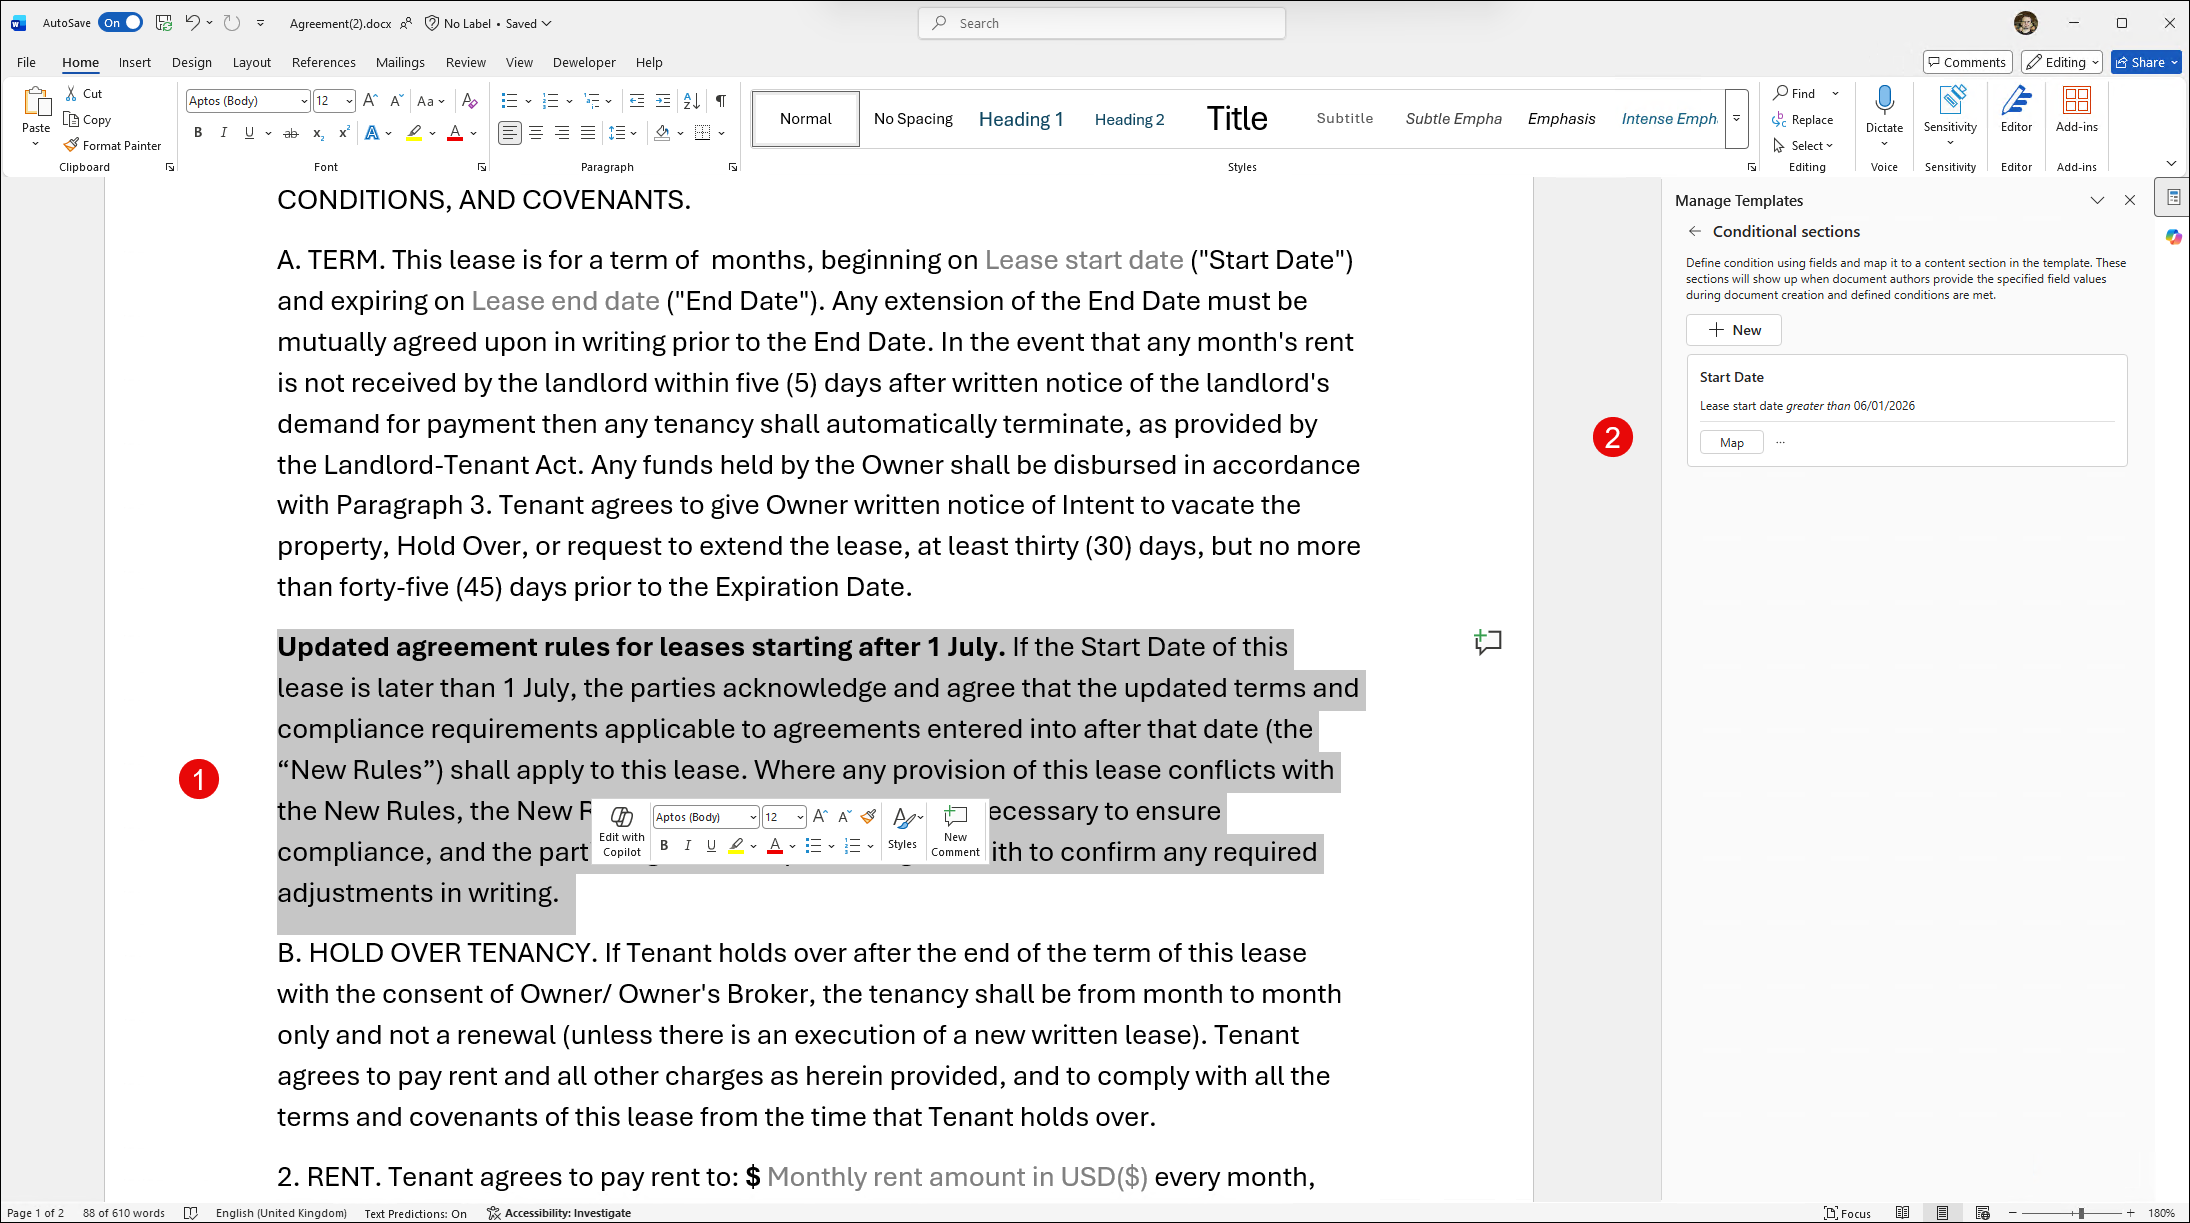
3. Map to the relevant document section – select a section in the Word file and then select the Map button in the Conditional section pane. Now this text fragment will be visible in the generated document when the Lease start date is greater than Jun 1, 2026.
Customize the Form
The next step is to configure the settings of the form. Select the Setting options from the right pane.
Settings:
- Notify me on submission (you will get a confirmation email).
- One response per person.
- Generate PDF from responses (by default, it generates a Word document, but you can get a PDF file).
- Accept responses (on/off)
- Custom closed-form message
You can also customize themes in the form. Select the Themes section and choose from the available forms (there are 4 predefined). You can also create your own custom one.
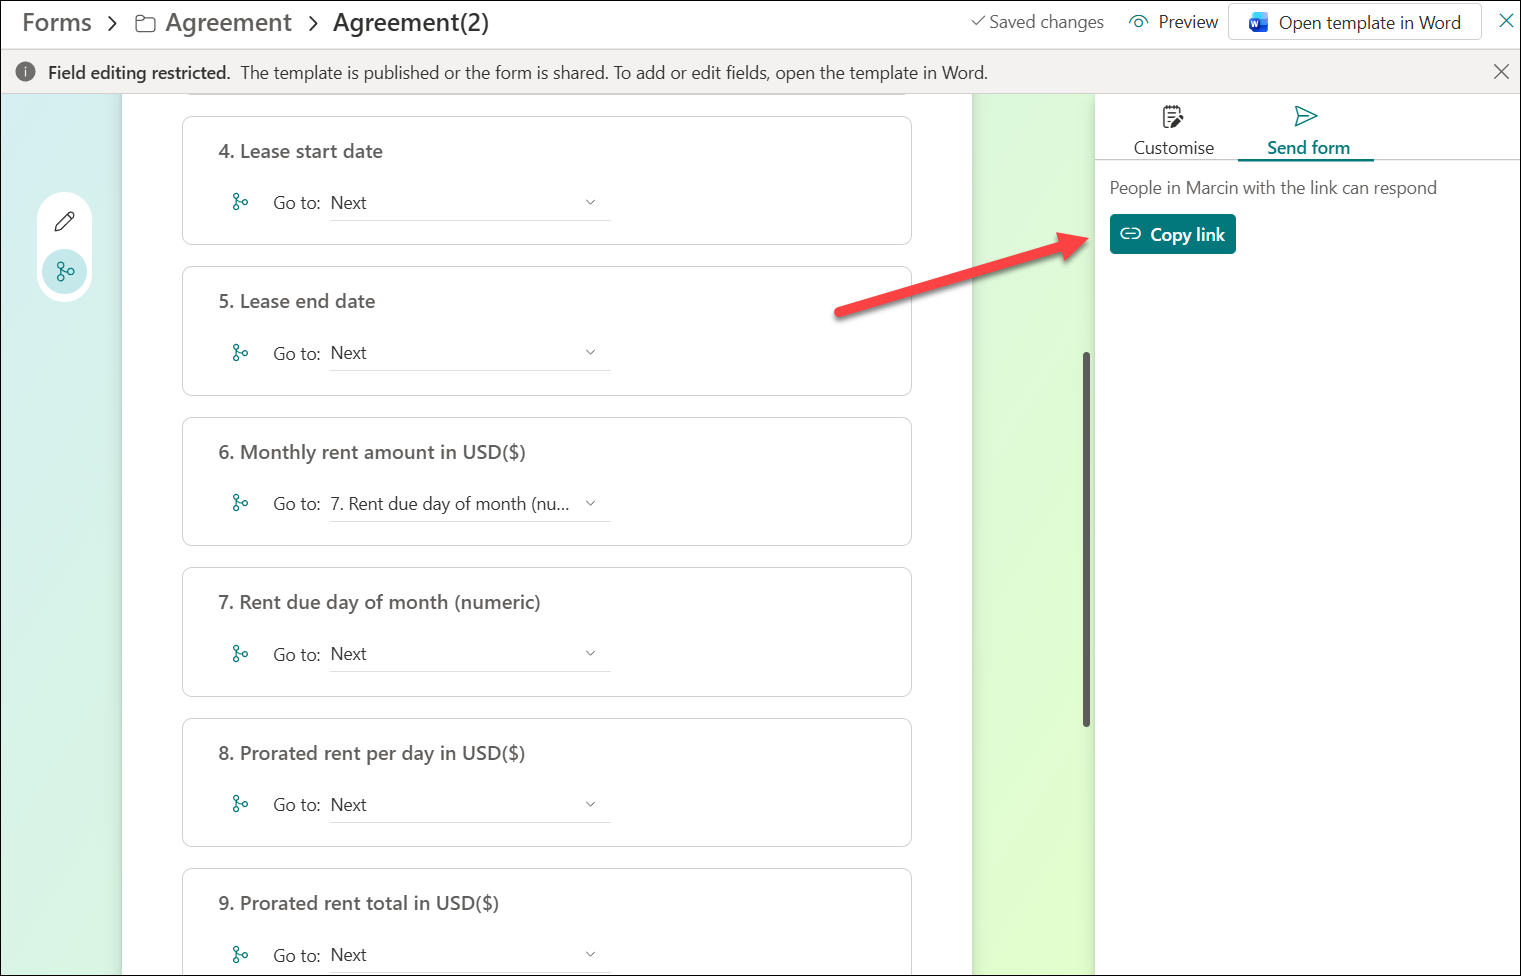
Share the Form
When the form is ready, you should share it with your users.
- Select the Send form tab and then the Copy link.
- Share via Teams, Outlook, SharePoint page, or SharePoint agent.
Key point worth highlighting: **the form URL never changes**, even after you republish with updated fields. Submitters always see the latest version.
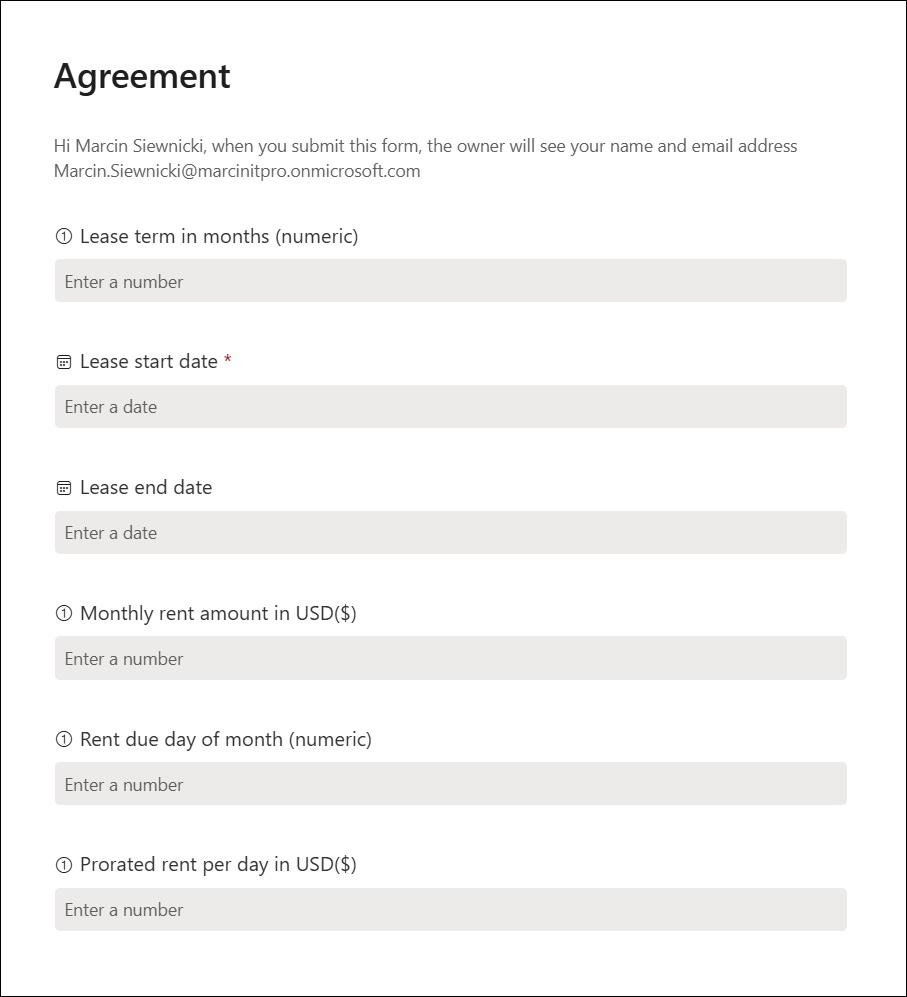
Fill Out and Submit the Form
The user just needs the form link to enter the required information. No Copilot license needed!
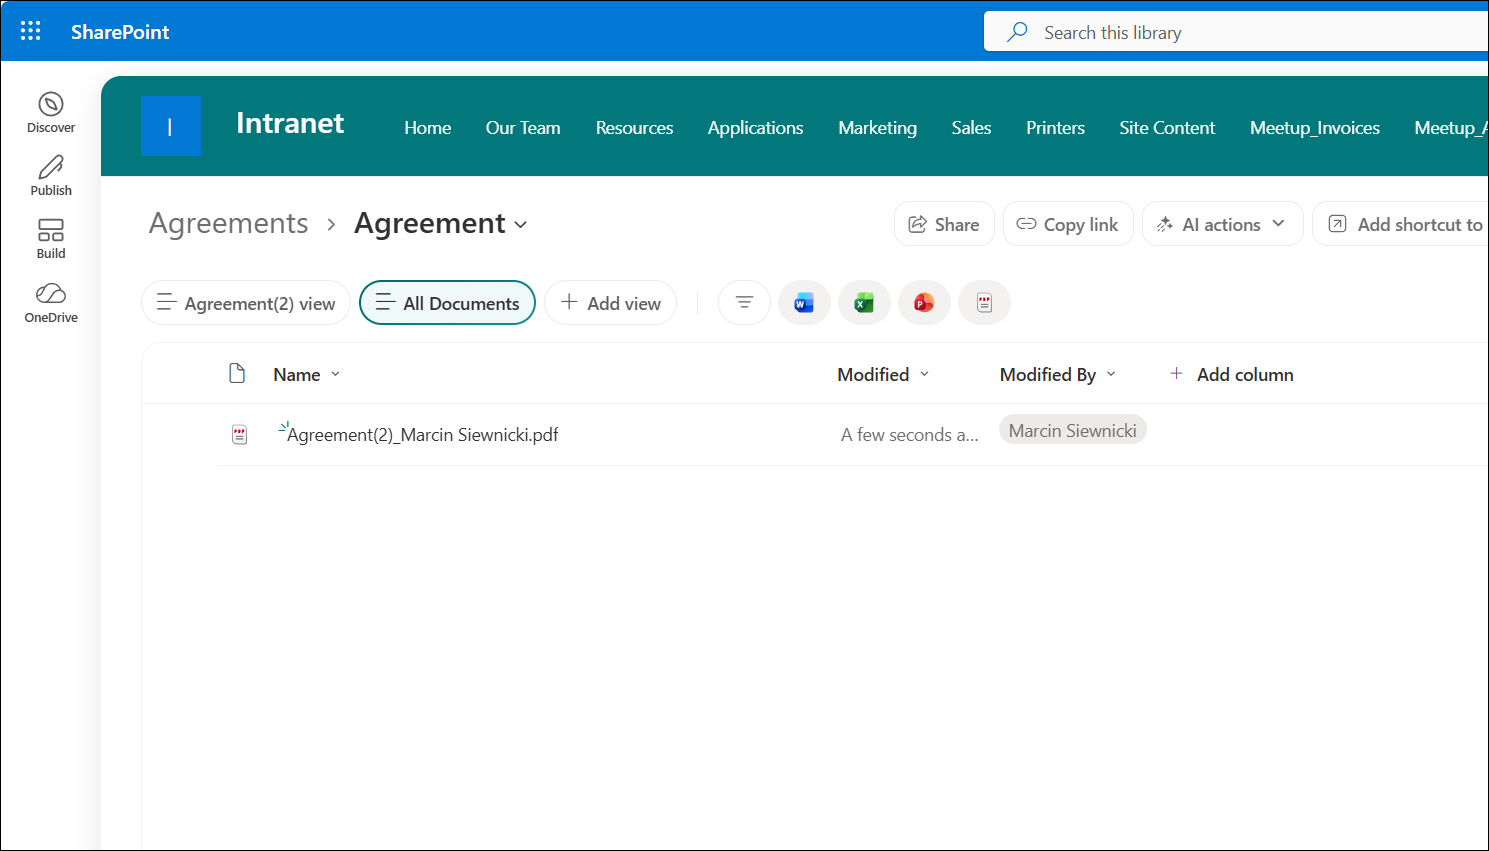
Each submission generates a file (Word or PDF) in the connected document library. Each file has a username entered as part of the name.
Summary
This feature solves a real problem – anyone who’s maintained document templates and watched people break them will appreciate the value here. You can create a form and be sure that the generated documents will be consistent and contain all required information. Plus, the low barrier for end users (just a browser form), and the automation potential via SharePoint metadata and Power Automate make it a really powerful option for process automation.