How many of your SharePoint sites have no owners? How many were created for a project that was finished two years ago? If you don’t know the answer, there is a solution for you – Site Attestation Policies in SharePoint Advanced Management. It’s an automatic mechanism that will help you keep your sites under control. Let’s start and test it out.
Introduction
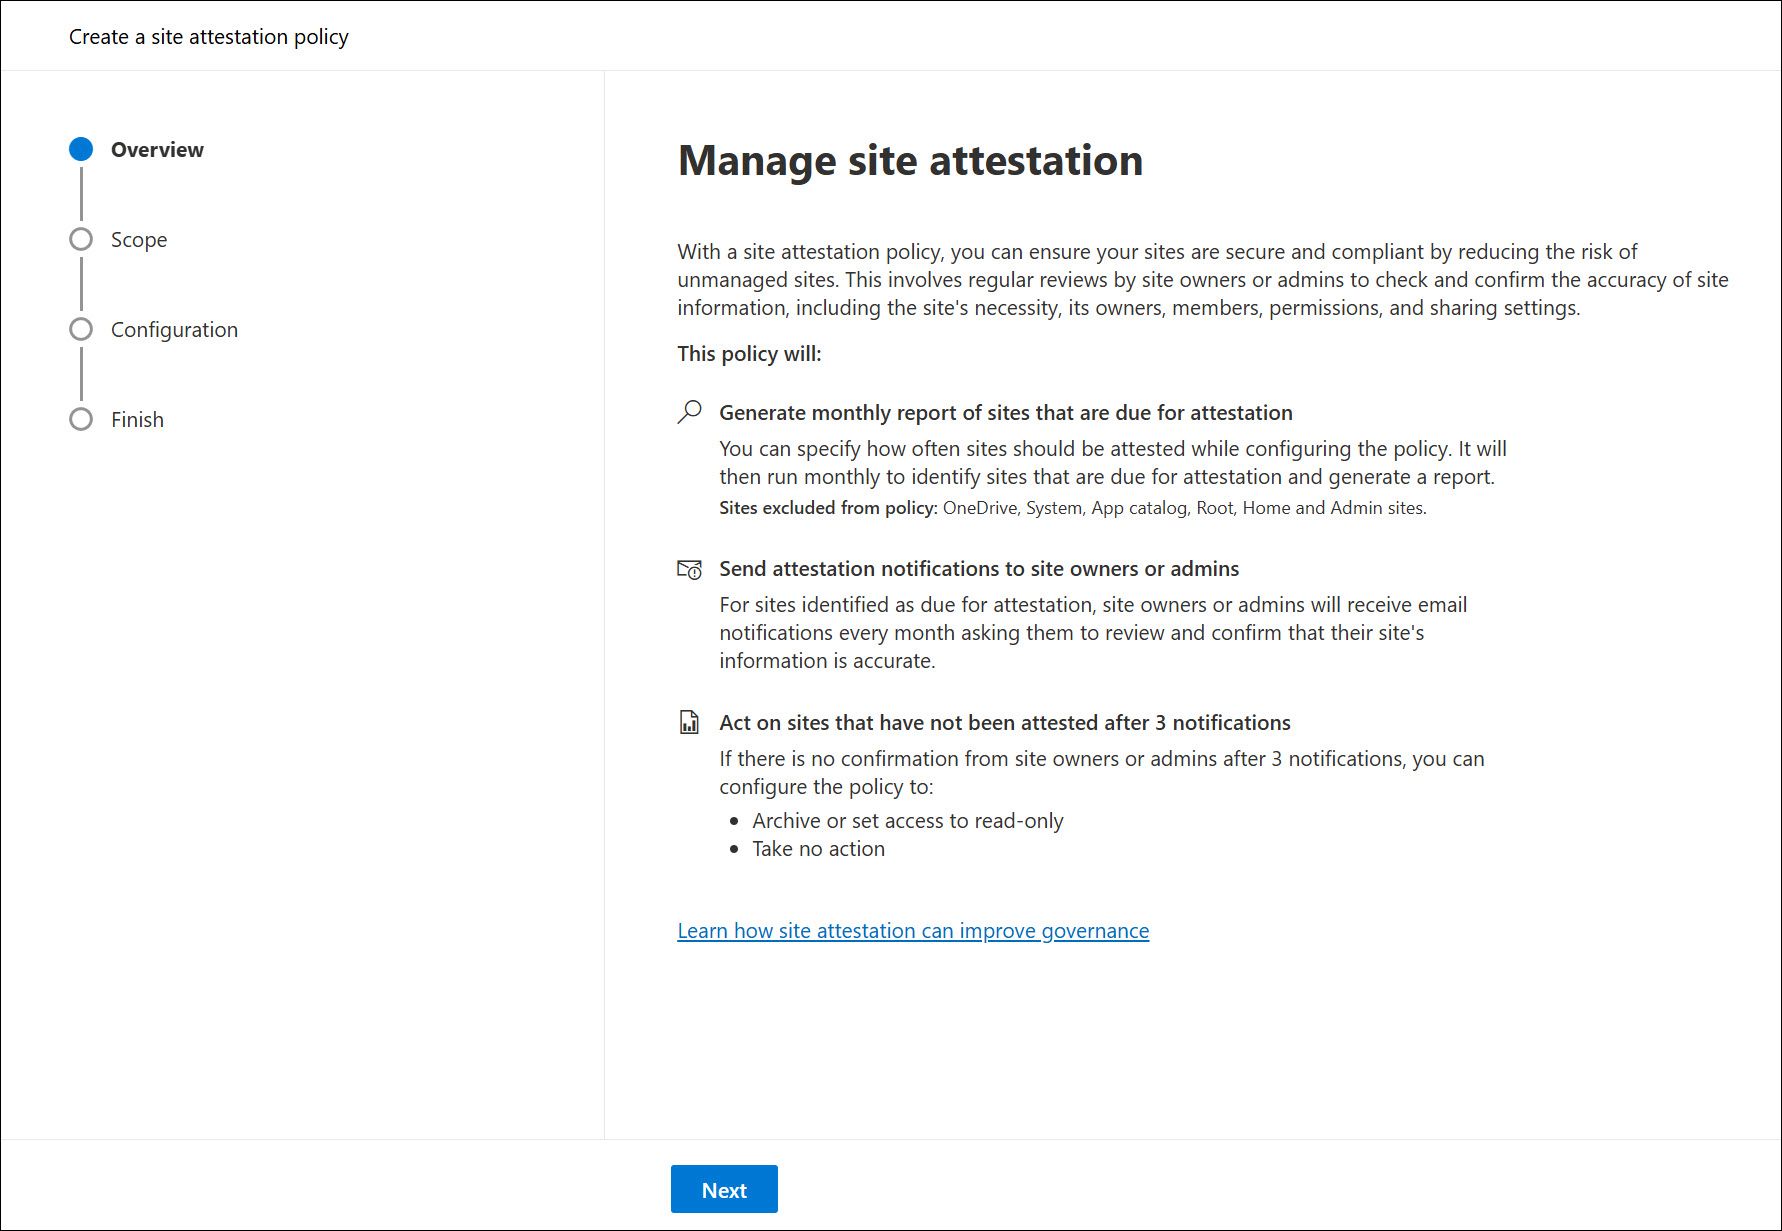
The site attestation policy is a feature designed to govern your SharePoint sites. It regularly sends emails to site owners and asks if the site is still needed or not. Owners can confirm or remove their sites if they are no longer needed. But you can control the entire process, monitor reviews, and enforce dedicated actions for sites that are not verified within the specific time window.
This policy solves one of the most important issues in SharePoint – checking and enforcing the quality of sites. Usually, there are many obsolete sites, many without owners, some with old and not needed content, some even completely empty, or with sensitive information but with outdated permissions.
Using this policy, you can enforce certain actions on site owners and clean the entire environment.
You must have one of the following base licenses:
- Office 365 E3, E5, A5,
- Microsoft 365 E1, E3, E5, or A5
At least one of the following conditions is met:
- At least one user in your organization is assigned a Microsoft 365 Copilot license. (The user doesn’t need to be a SharePoint administrator.)
- Your subscription includes SharePoint K, P1, or P2, and your organization has purchased the SharePoint Advanced Management Plan 1 add-on.
If you meet requirements, you can go to the SharePoint Admin Center and start creating your very first attestation policy.
How to create
Before you start, you must be a SharePoint admin to work with the policy.
1. Navigate to the SharePoint admin center and select Policies > Site lifecycle management in the left navigation pane.
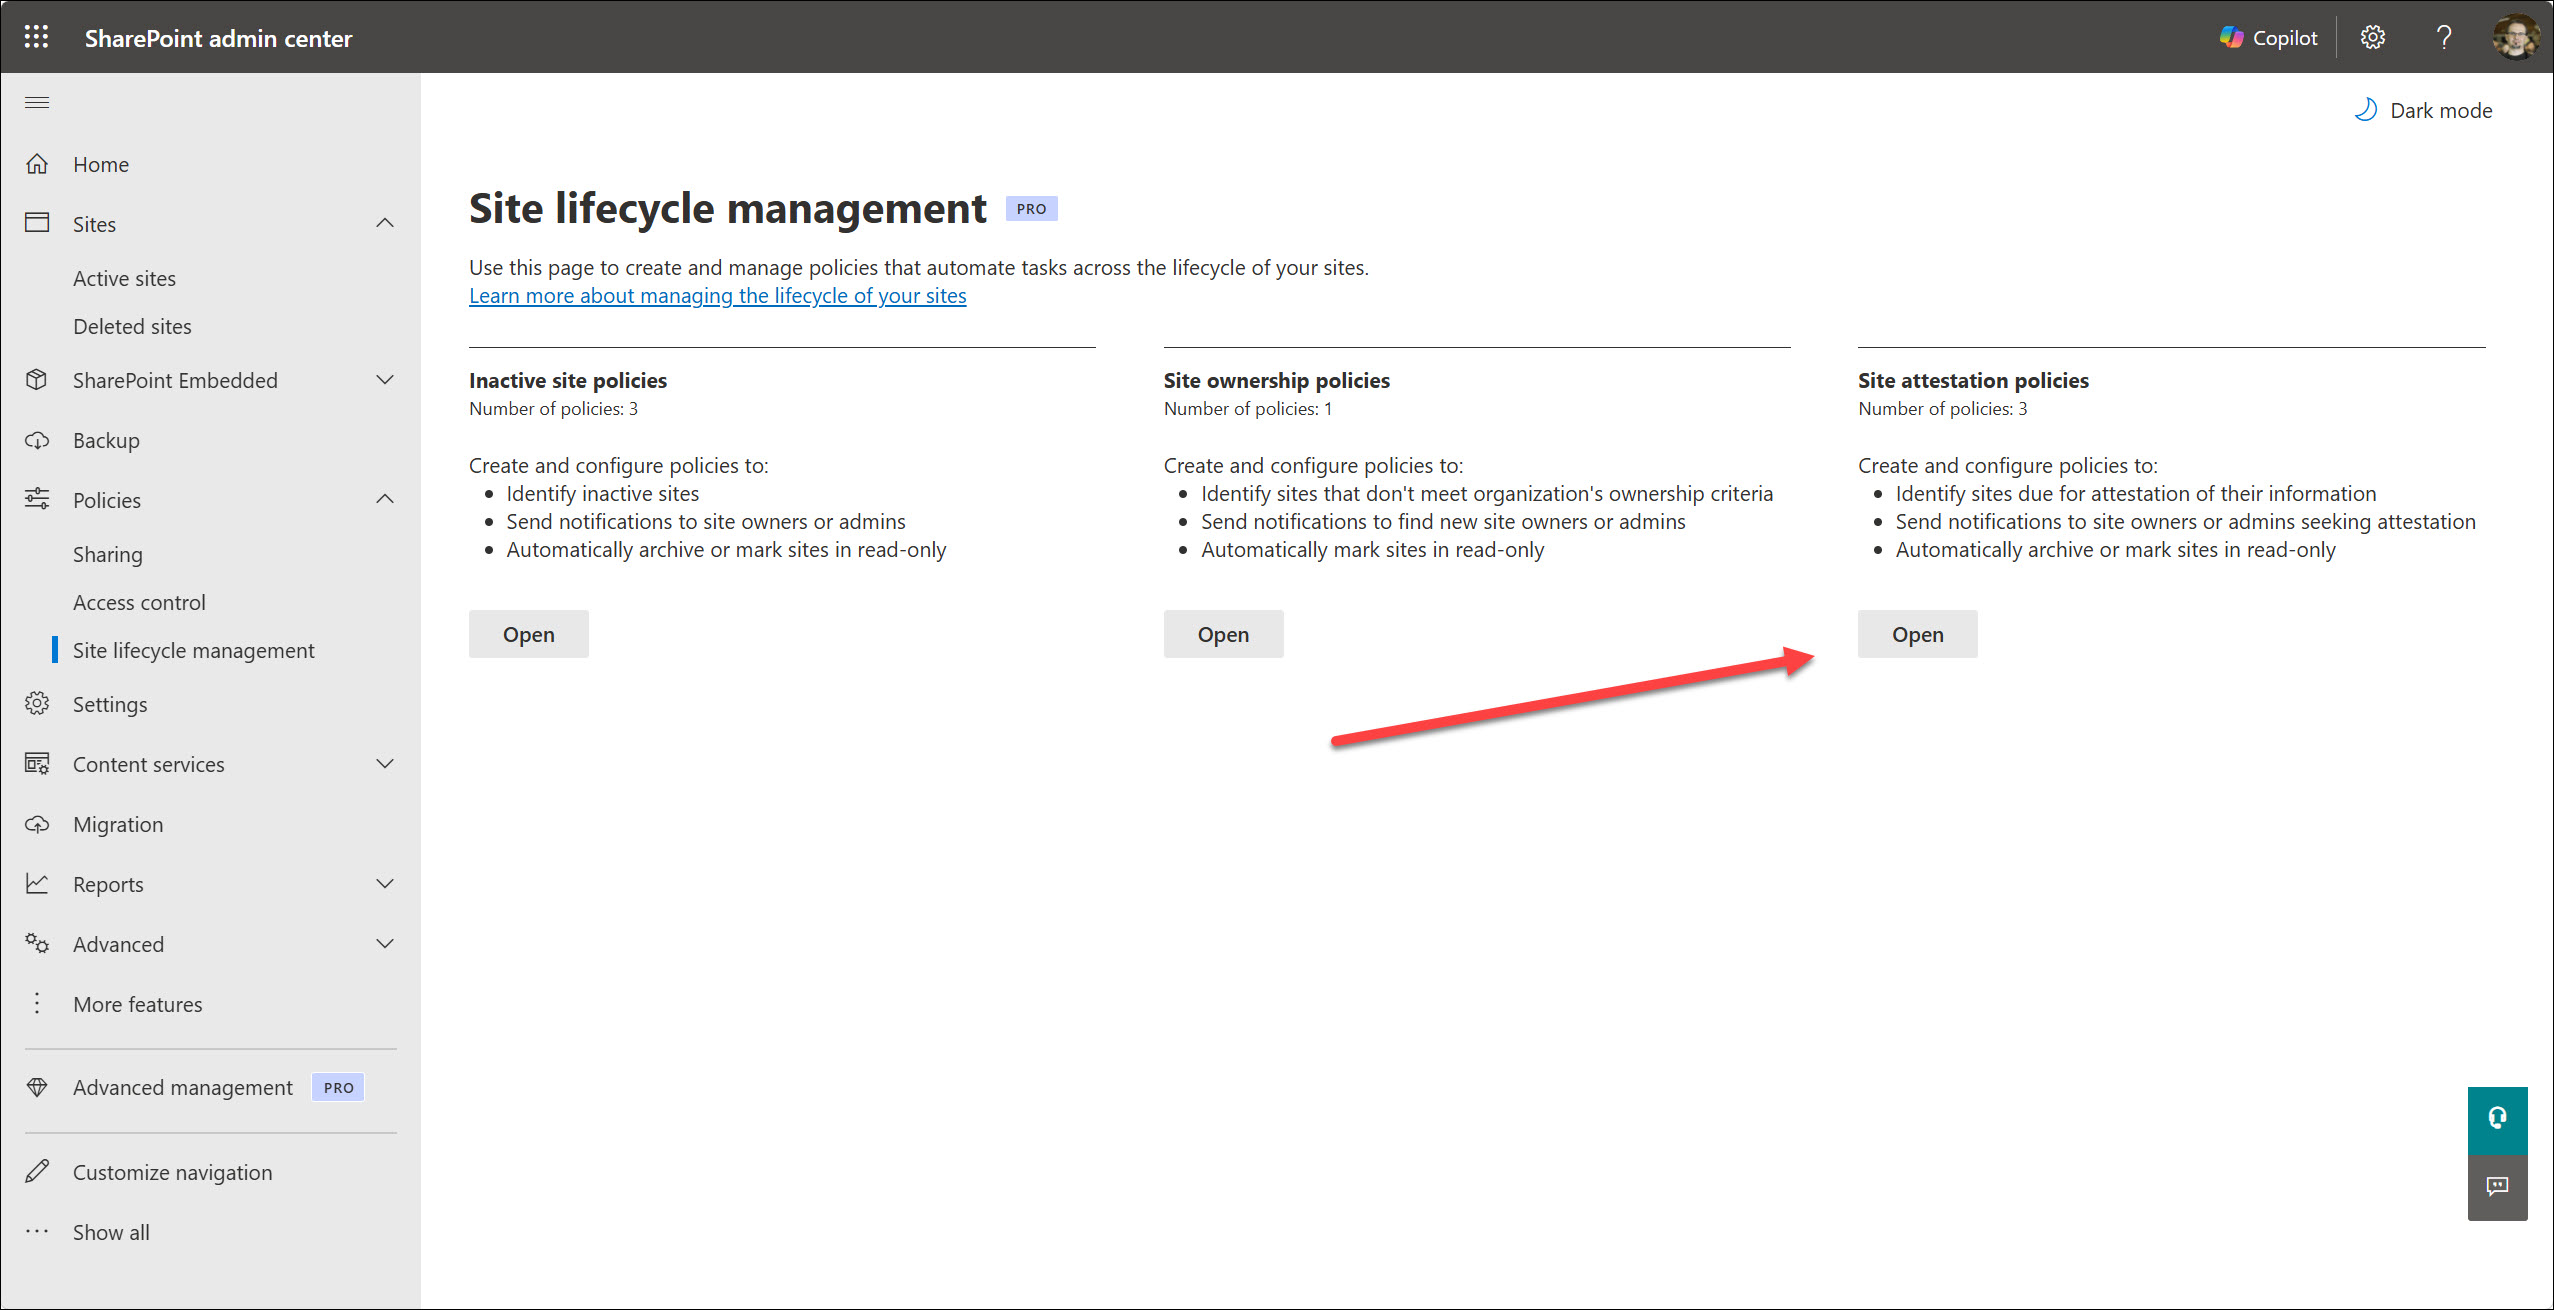
2. Select the Open button in the Site attestation policies section.
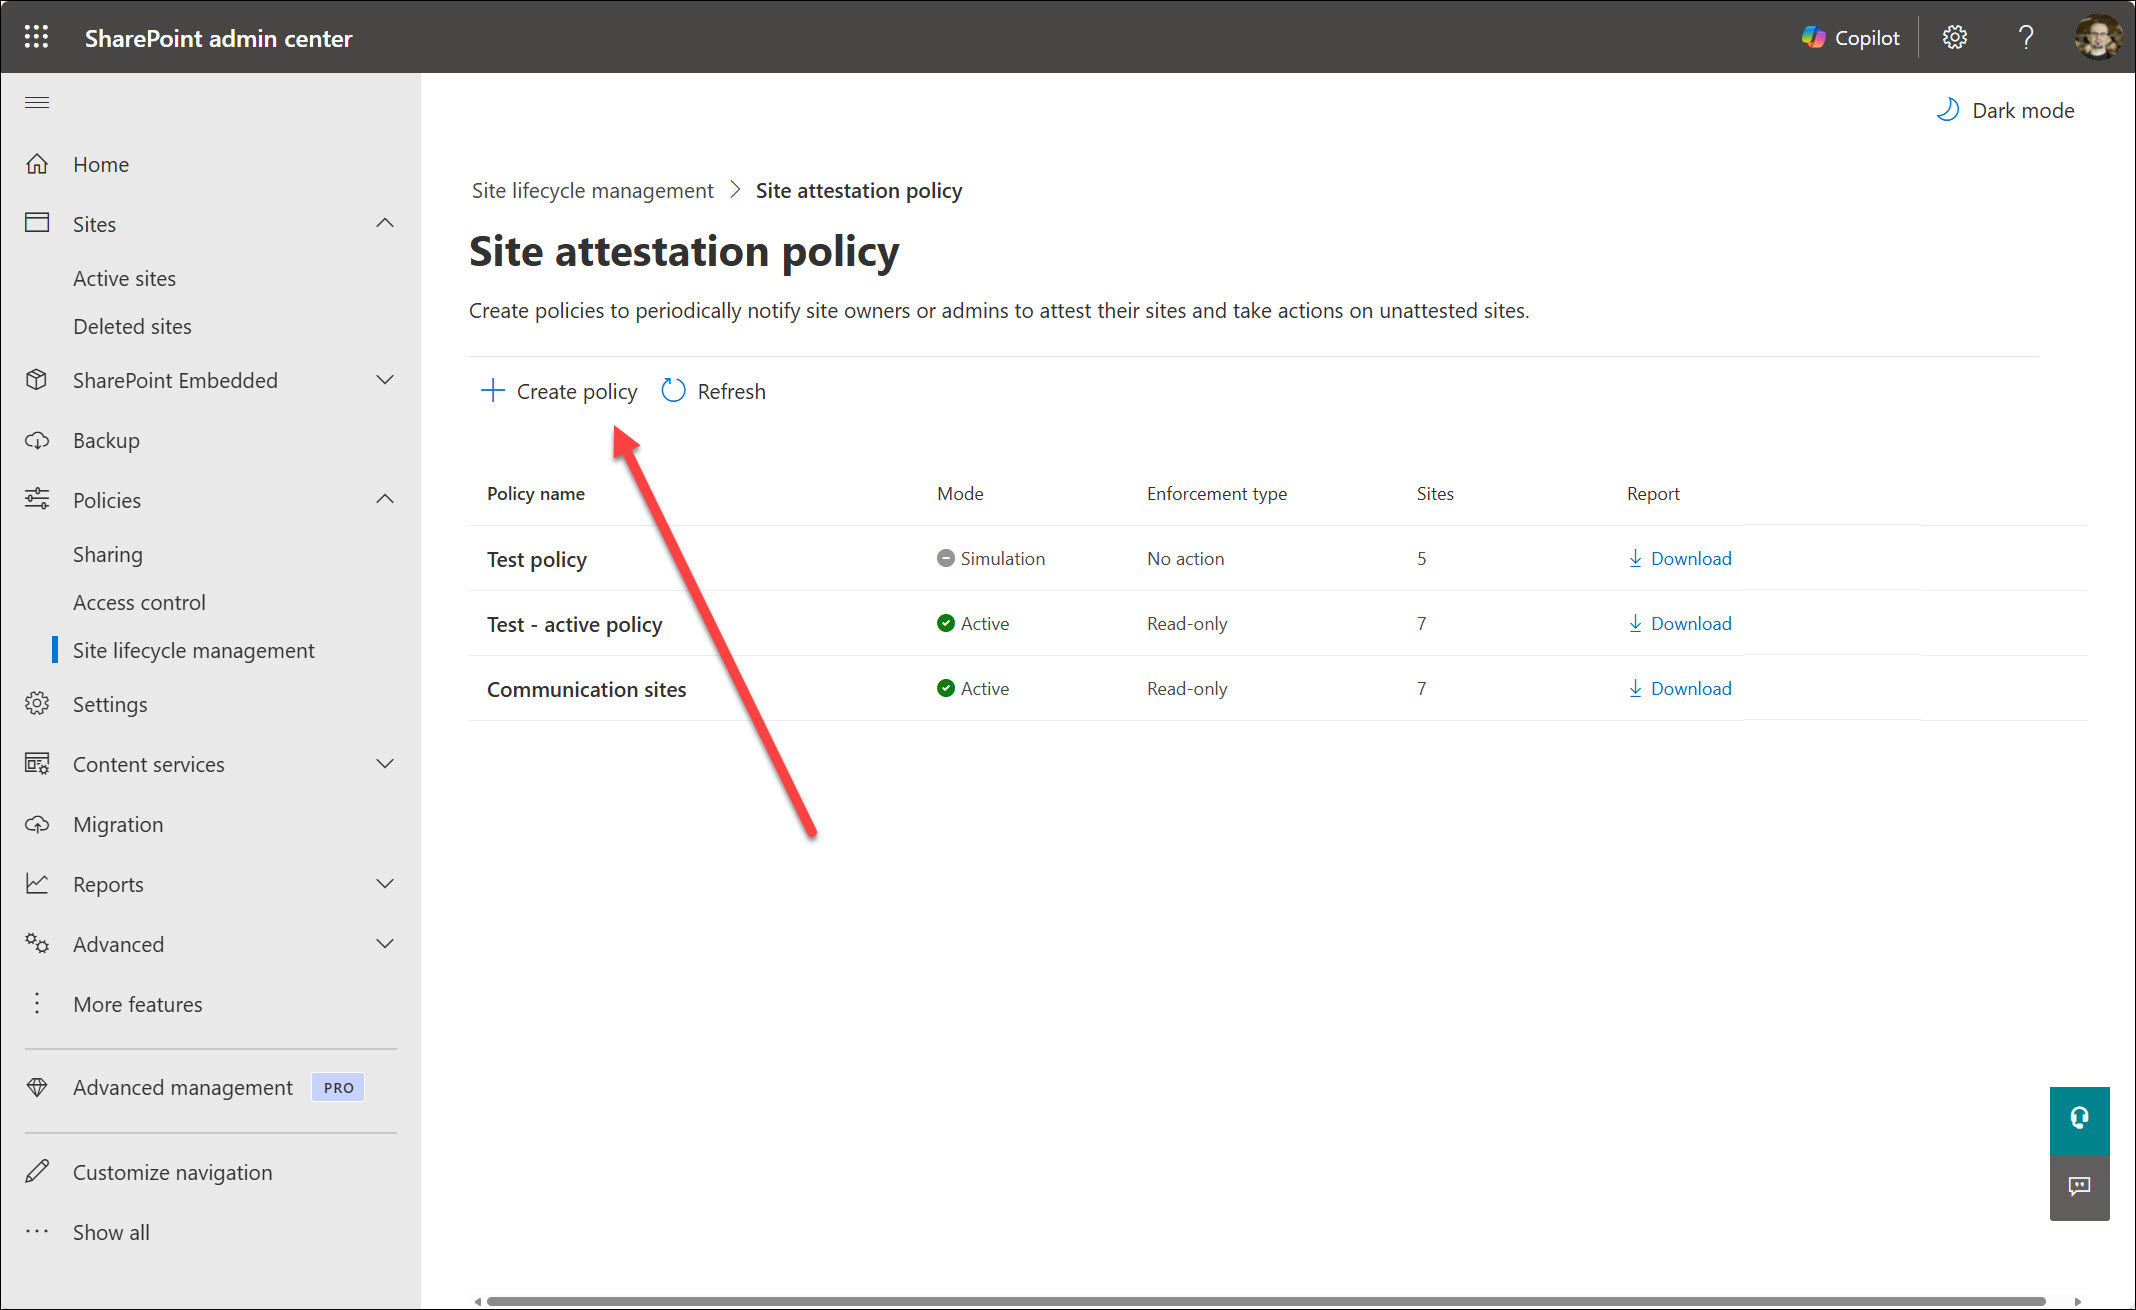
3. Select the Create policy button.
4. On the first page, select the Next button.
5. There are 2 options:
a. Upload a CSV file with up to 10000 URLs.
You can download the CSV file template, provide your sites, and upload your file. This is a great method if you have a list, or you can’t easily filter them.
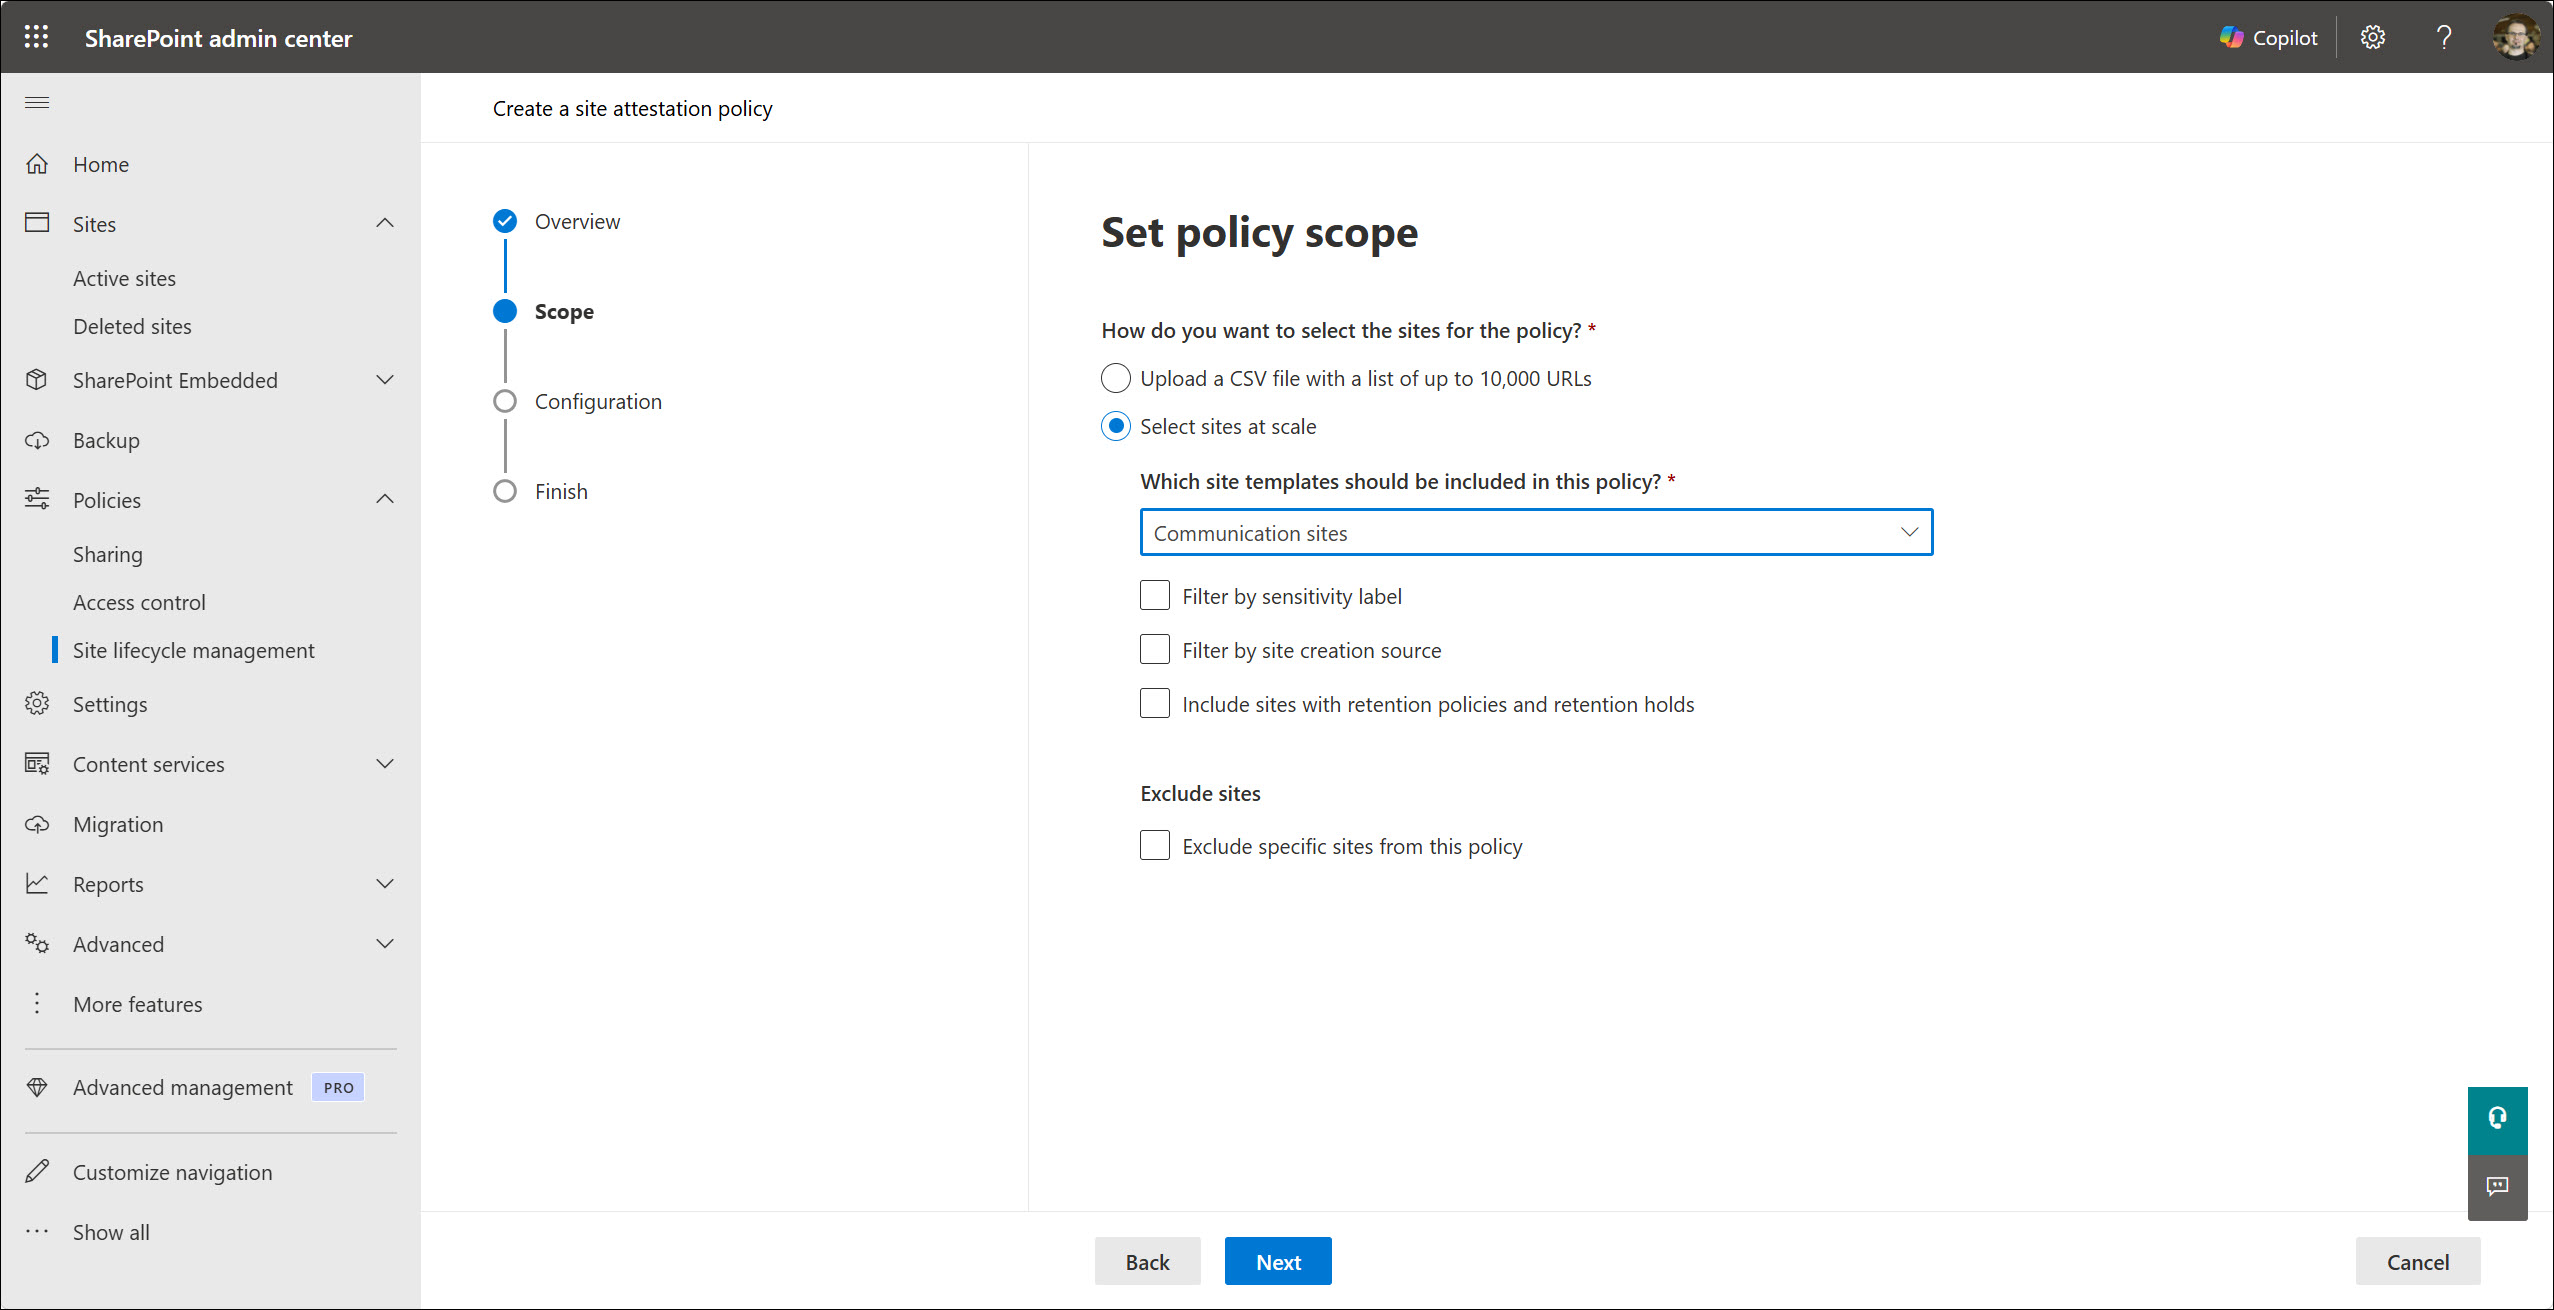
b. Select sites at scale.
This method gives you a few filters: site template, sensitivity label, creation source (for example, Teams, SharePoint Home, PowerShell), retention settings, and a list of excluded sites.
For the test, I selected a filter for Communication sites only.
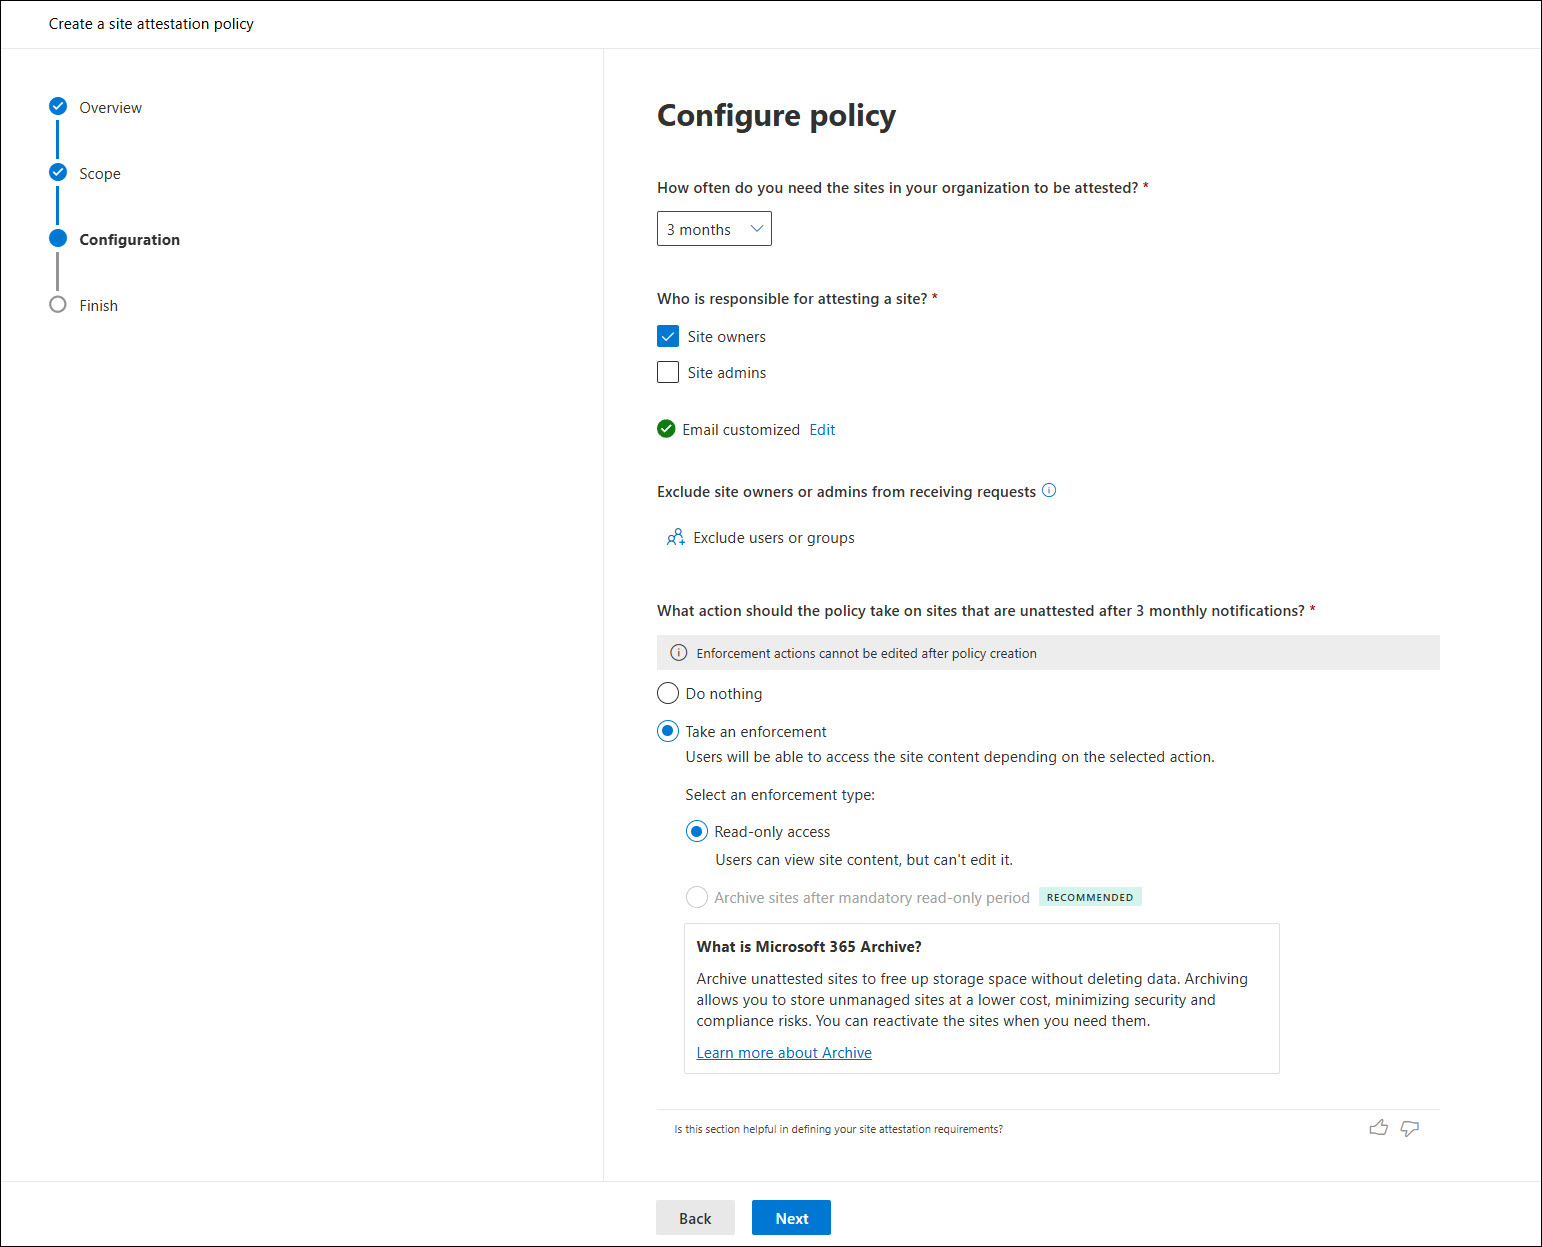
6. Now it’s time to configure the policy. You can select the frequency of the review process (3,6,12 months), who will get the email notification (site owners or/and site admins), exclude specific admins from the process, and specify the enforcement actions (do nothing, make it read-only, archive it).
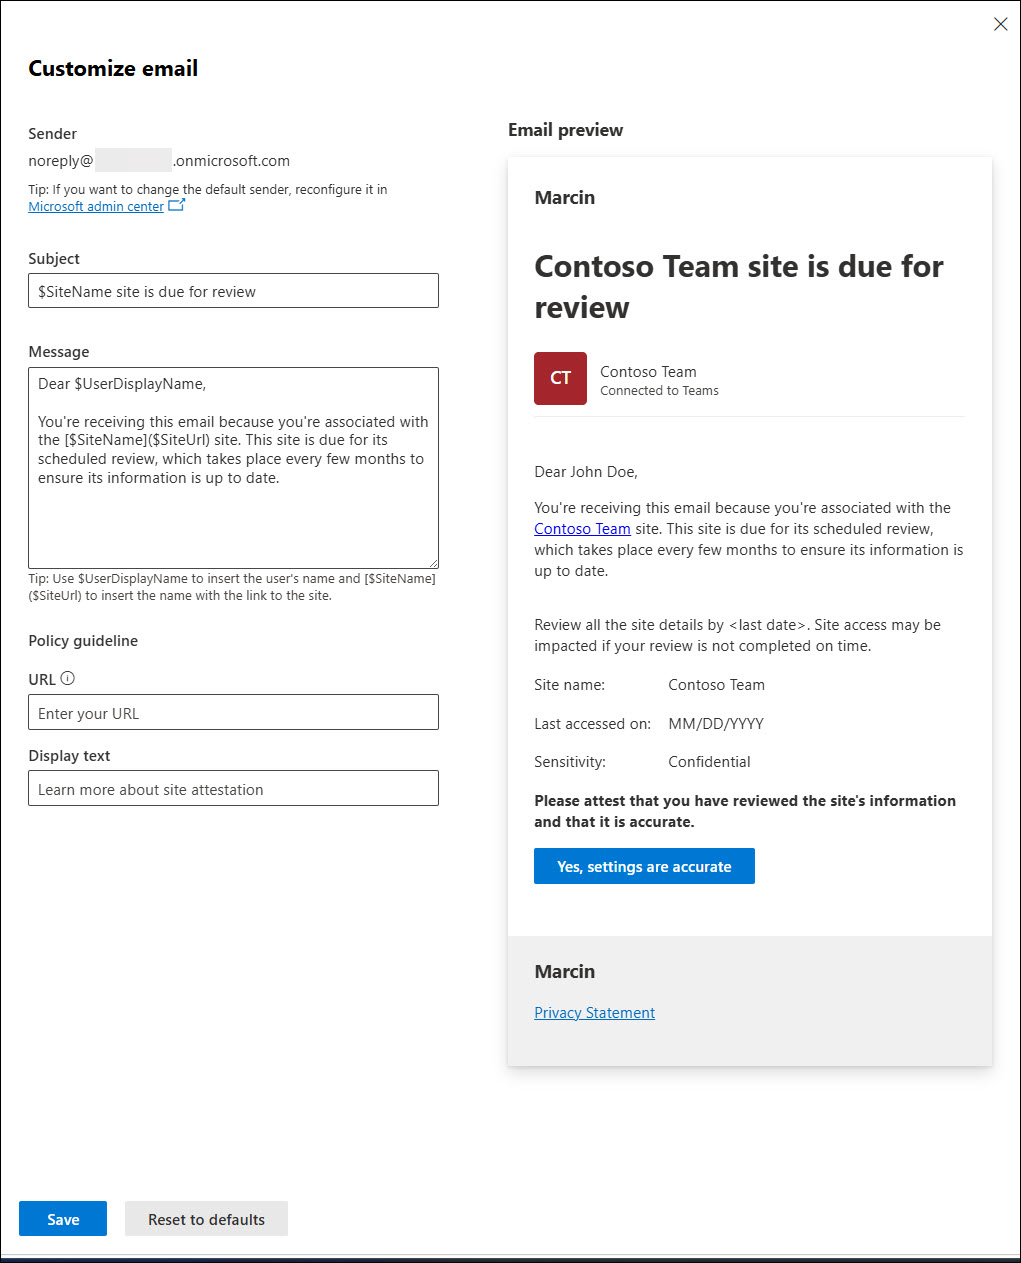
You can also configure and customize an email message – this is a very important step. You should make the information clear with all the required information. You can also add links to your policy guide or procedure.
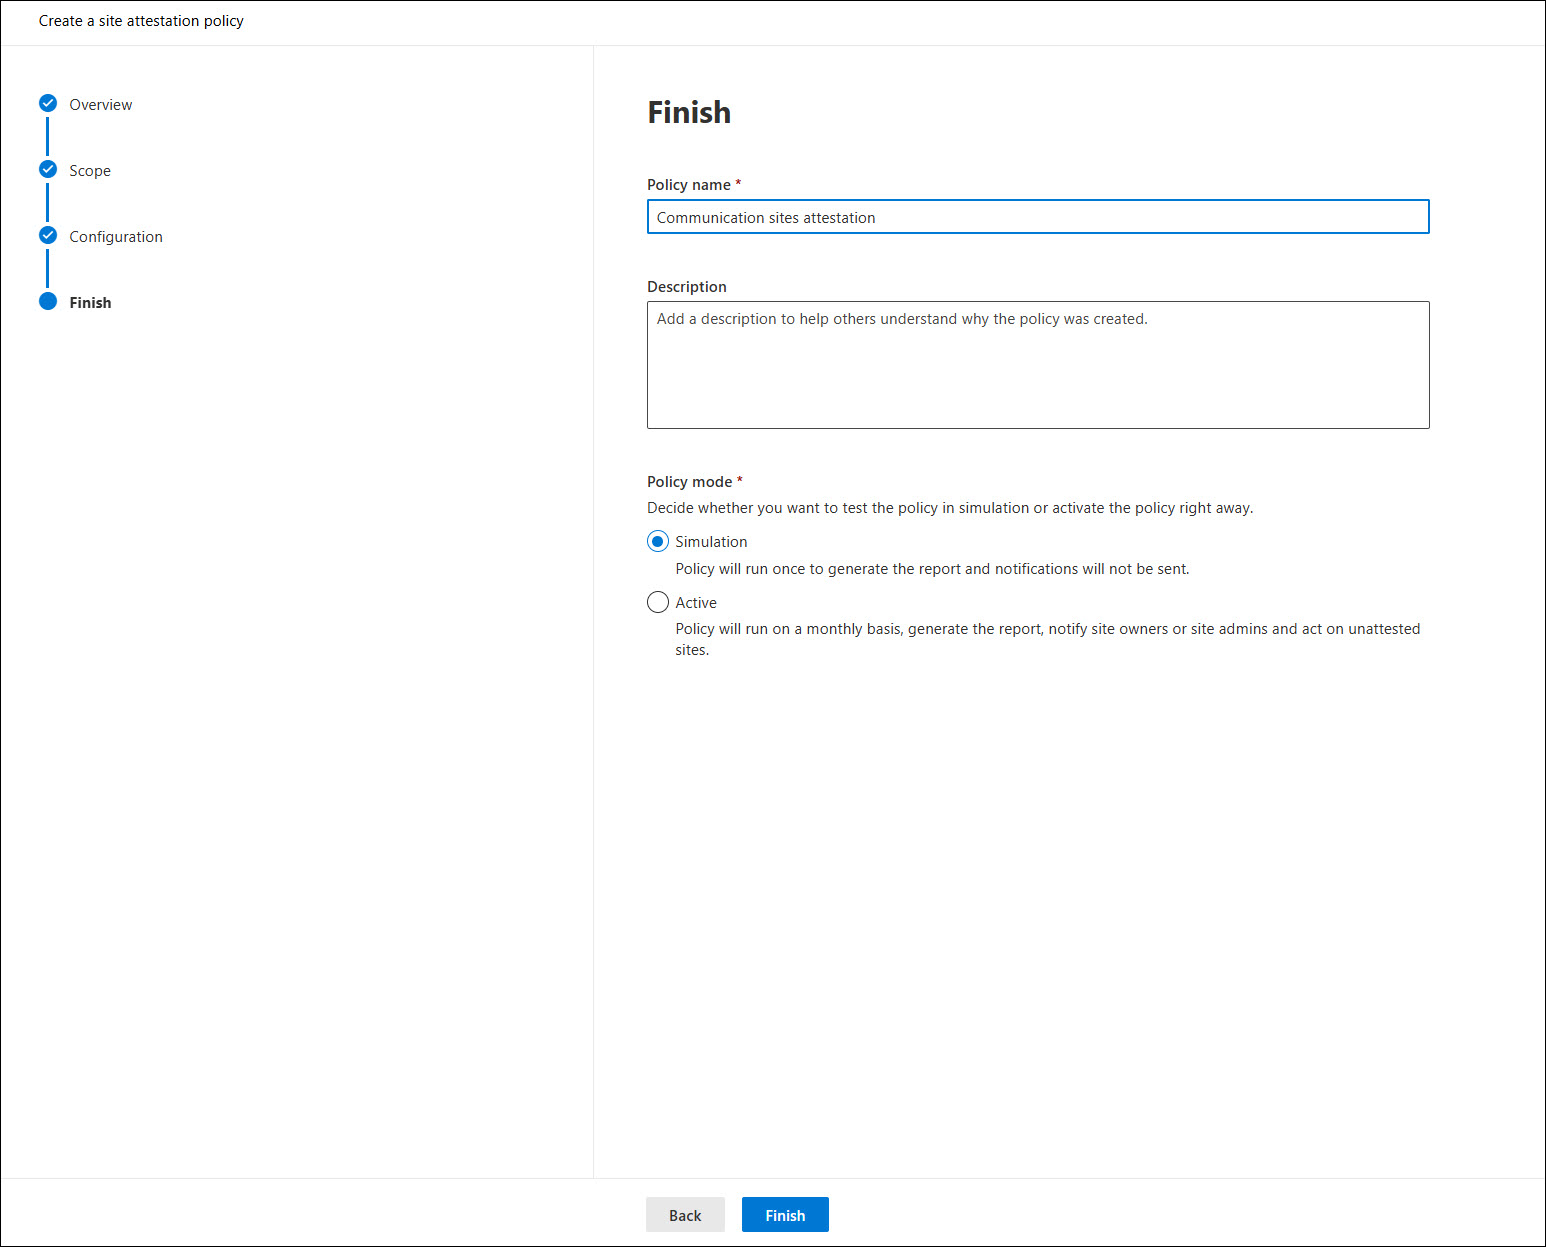
8. The last step is to select a policy mode: Simulation (runs once and generates a report only) or Active (scheduler with all configured options). For testing, I recommend starting with the Simulation mode.
Monitoring and Reports
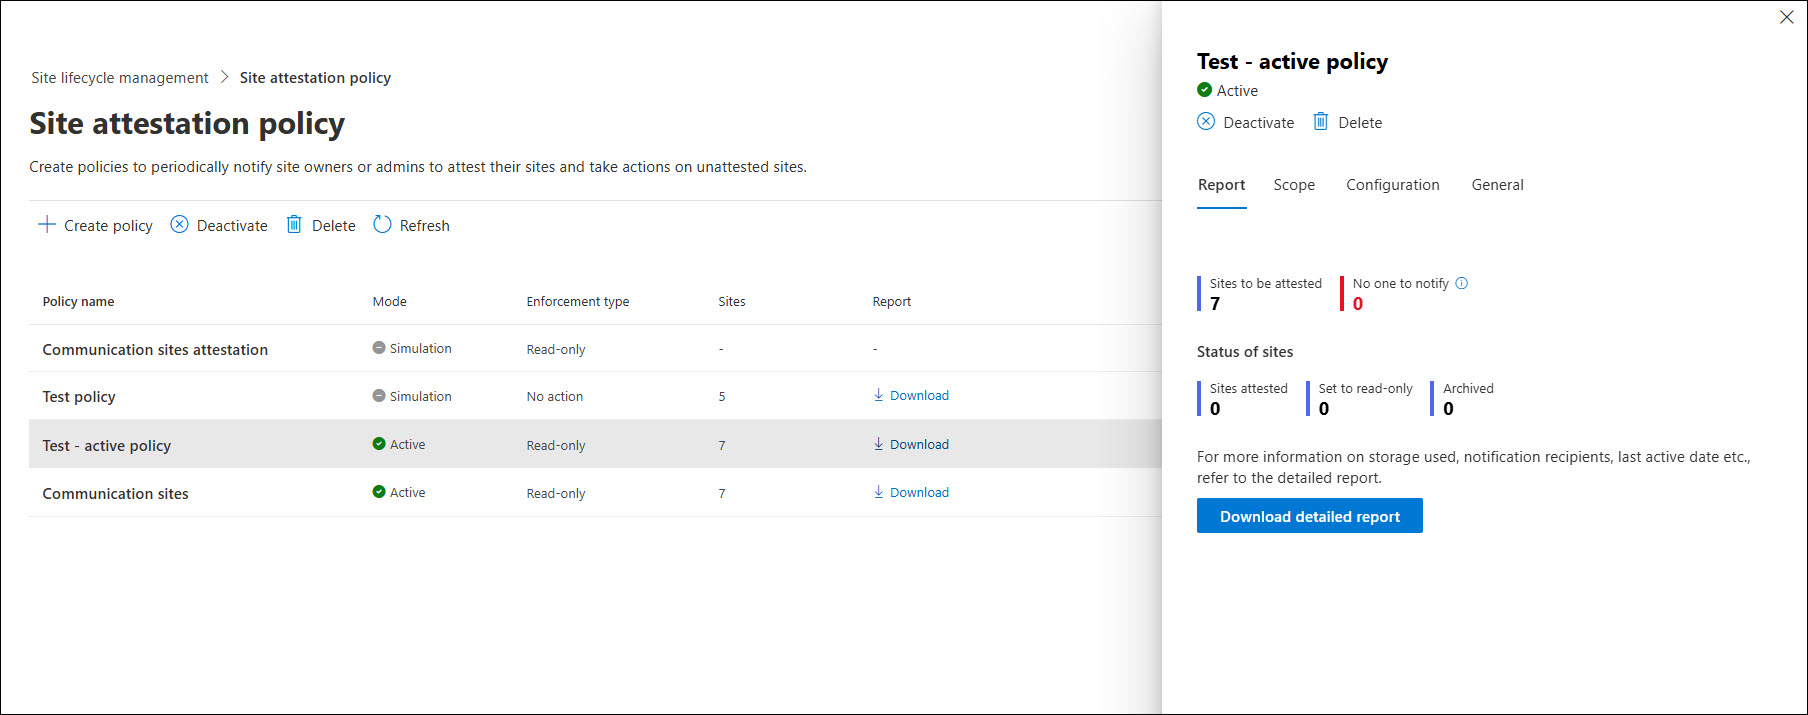
To check and monitor your policies, navigate to the Site attestation policy section. There are all policies (active and inactive) with details about each one. Select your policy to check details and download a report if it’s available.
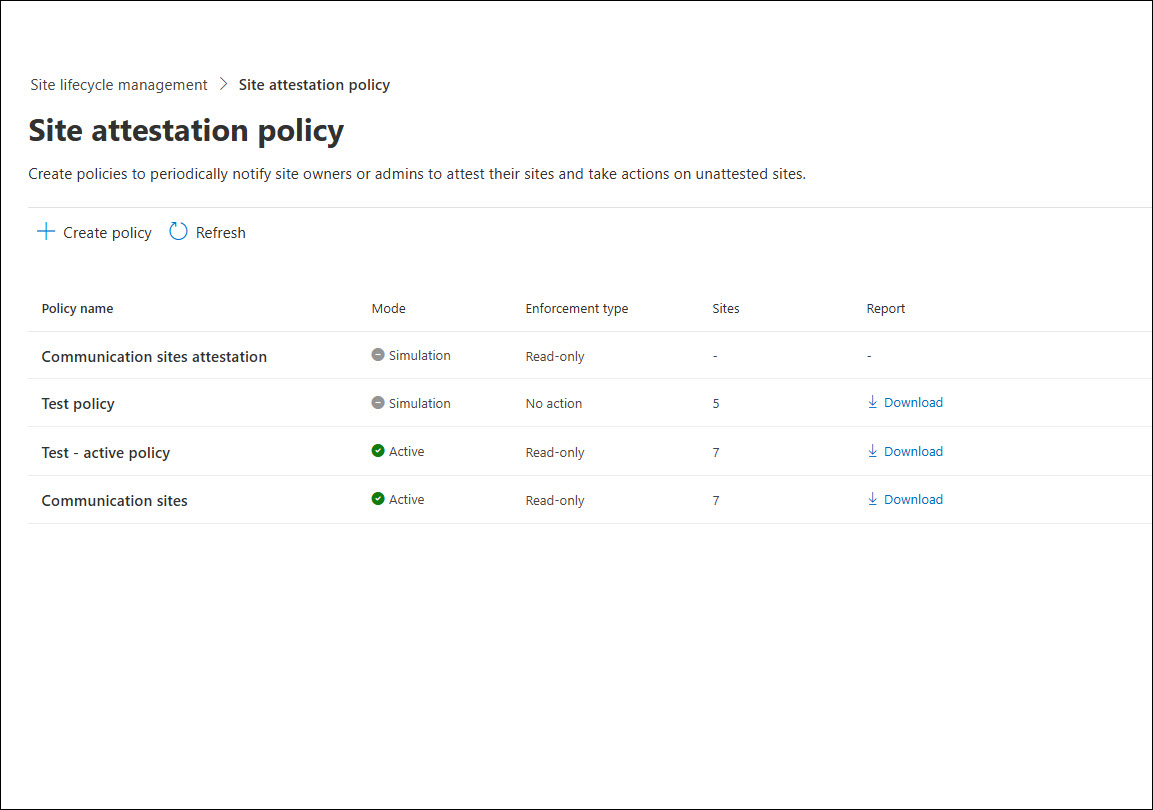
The policy details section contains a number of sites for attestation, attested sites, set to read-only mode, and archived sites. You can also download detailed reports as a CSV file. The reports contain information about sites, owners, last activity, storage used, etc. It’s helpful if you have many sites and want to check progress.
Summary
The Site attestation policy is a great feature for every SharePoint admin. It’s hard to manage if you have hundreds or thousands of sites. 5000 sites are not a big number because each team in Teams can have multiple sites! Add sites created from Microsoft 365 Groups, intranets, departments, etc. It’s really hard to manage all of them regularly.
The policy gives you automatic tools without any 3rd party software or PowerShell scripting. It’s native, requires only 1 Copilot license for any user, and provides what’s most important – a review process with actions. It’s basic stuff, but it will do the job for most companies.